> For the complete documentation index, see [llms.txt](https://docs.enlyze.com/llms.txt). Markdown versions of documentation pages are available by appending `.md` to page URLs; this page is available as [Markdown](https://docs.enlyze.com/en/connect/ot-connectivity/supported-industrial-protocols/s7+.md).

# S7+

Set up the S7+ protocol for ENLYZE.

This guide walks you through connecting data sources that communicate via the S7+ protocol, a [Siemens](/en/connect/ot-connectivity/supported-controller-brands/siemens.md)-specific protocol.

## Supported devices

* Siemens S7-1200
* Siemens S7-1500
* Siemens ET 200SP

## Required information

<table><thead><tr><th width="293.6058349609375">Information</th><th>Comment</th></tr></thead><tbody><tr><td>Name</td><td>Pick a descriptive name for your data source</td></tr><tr><td>Edge Device used for the connection</td><td>Printed on a sticker on each Edge Device. Follows the pattern <code>adjective-scientist</code></td></tr><tr><td>Machine</td><td>Each data source is assigned to exactly one machine</td></tr><tr><td>Manufacturer</td><td>Siemens</td></tr><tr><td>Device information</td><td>Use the CPU model. Compare with the controller page.</td></tr><tr><td>IP</td><td>The IP must be <a href="/en/connect/edge-device/enlyze-edge/network-tools.md">reachable</a> from the Edge Device</td></tr><tr><td>Port</td><td>Default: <code>102</code></td></tr><tr><td>Password (optional)</td><td>Required if the controller is password-protected</td></tr></tbody></table>

{% stepper %}
{% step %}

#### Connect the data source to the network

If not already done, establish a network connection between the data source and the Edge Device. See [Integration scenarios](/en/connect/integration-scenarios.md) for the available options.
{% endstep %}

{% step %}

#### Create the data source

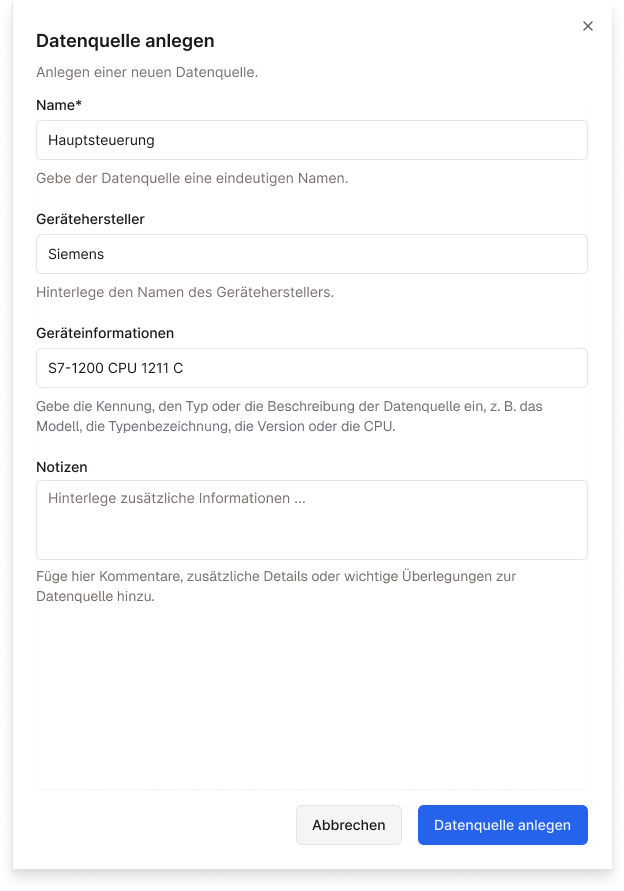
Open the [ENLYZE Manufacturing Data Platform](https://app.enlyze.com/platform), select the machine you want to add the data source to, and click *+ Data source*.

Enter the device details first. For the "Device information" free-text field, use the CPU model.

<figure><img src="https://4261006941-files.gitbook.io/~/files/v0/b/gitbook-x-prod.appspot.com/o/spaces%2FSNEuiyRRKwuqtIcaEt45%2Fuploads%2Fgit-blob-c937400e85d2ab55b97e0647ea5f9fa8560e75b5%2Fconnect-ot-create-datasource-01.png?alt=media" alt="" width="312"><figcaption><p>Creating a data source in the ENLYZE Platform</p></figcaption></figure>
{% endstep %}

{% step %}

#### Add connection details

To establish the connection and start recording data, enter the connection details.

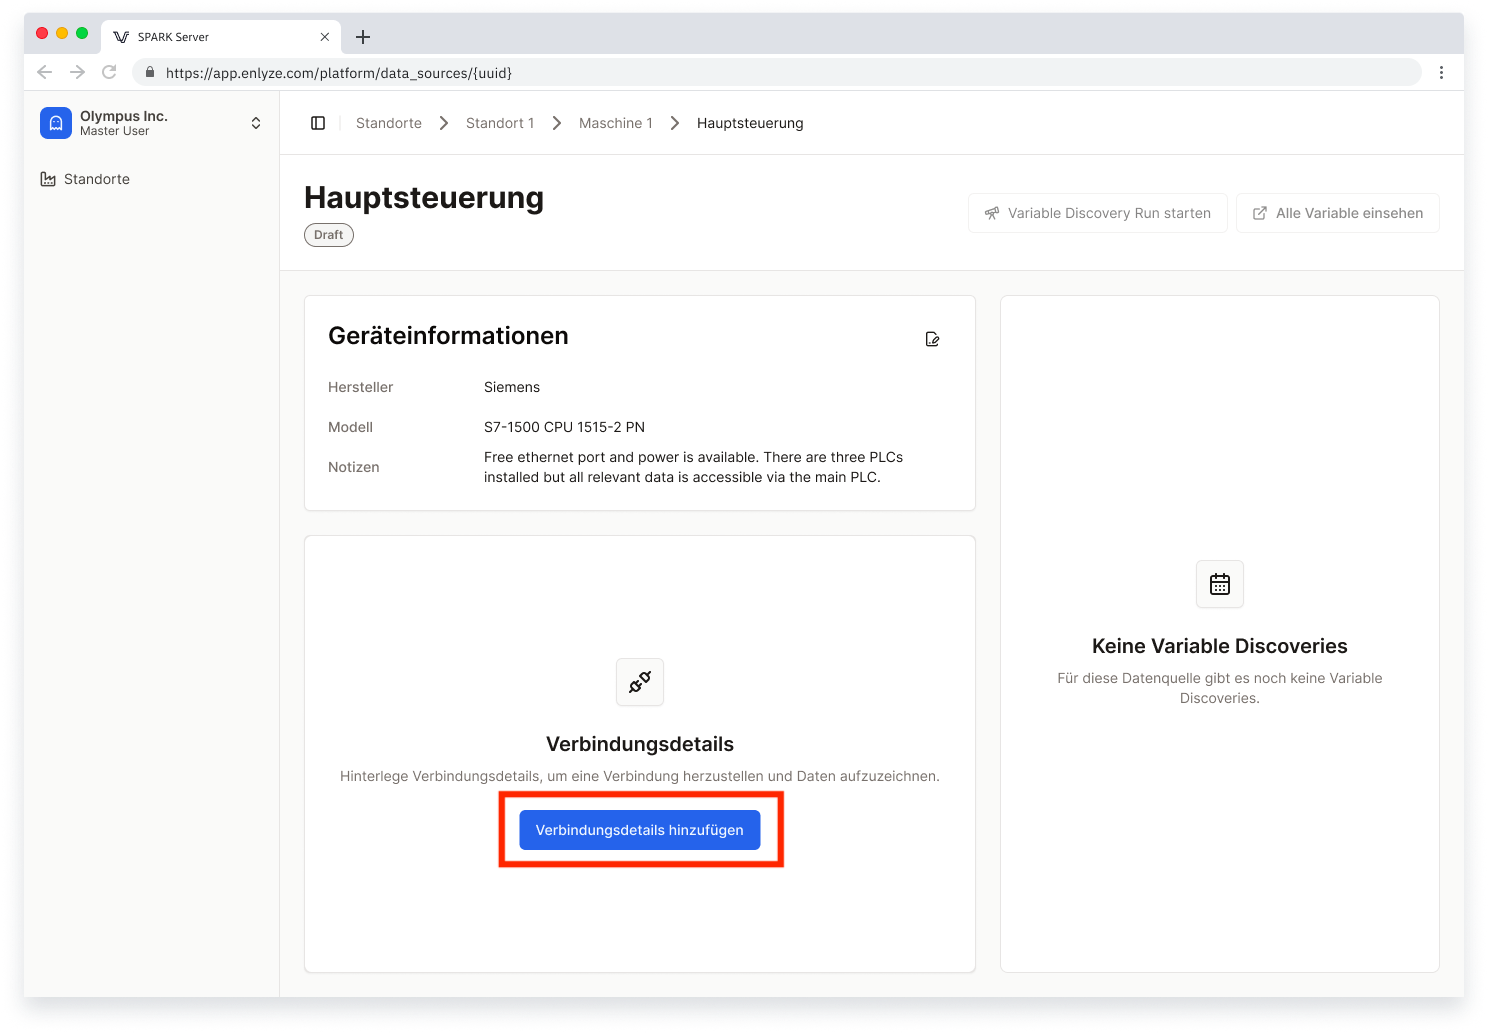
Click *Add connection details*:

<figure><img src="https://4261006941-files.gitbook.io/~/files/v0/b/gitbook-x-prod.appspot.com/o/spaces%2FSNEuiyRRKwuqtIcaEt45%2Fuploads%2Fgit-blob-761d29411163bdefbcd1a5c02c14fe177e04f9f3%2Fconnect-ot-datasource-detail-01.png?alt=media" alt=""><figcaption><p>Adding connection details for a data source</p></figcaption></figure>

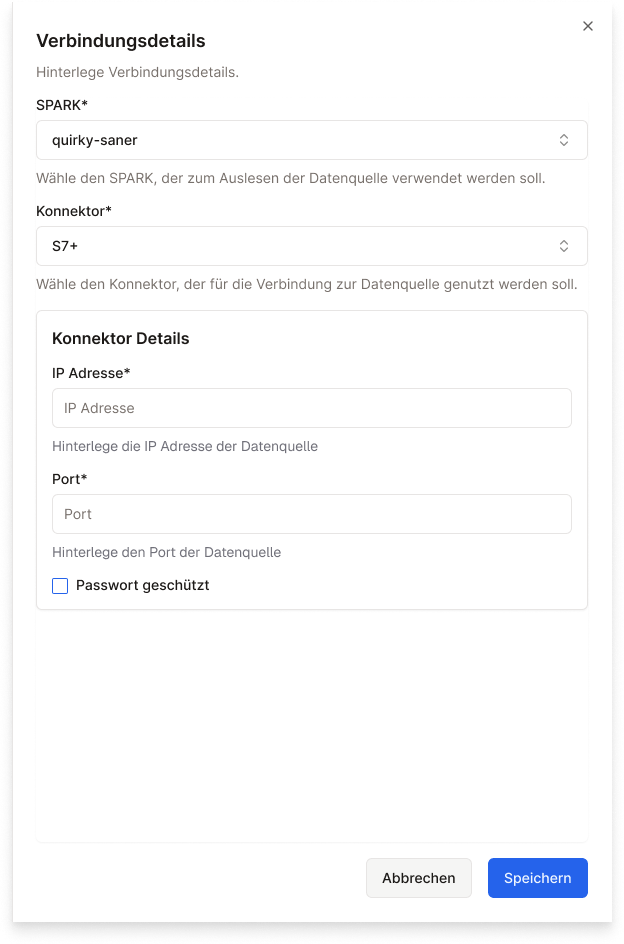
Then enter all connection details and *save* them.

<figure><img src="https://4261006941-files.gitbook.io/~/files/v0/b/gitbook-x-prod.appspot.com/o/spaces%2FSNEuiyRRKwuqtIcaEt45%2Fuploads%2Fgit-blob-94fa6024968e26e289da3d76a5baa49fb4a849b8%2Fconnect-ot-connection-details-01.png?alt=media" alt=""><figcaption><p>Entering connection details</p></figcaption></figure>
{% endstep %}

{% step %}

#### Add variables

The `S7+` protocol supports [Variable Discovery](/en/connect/ot-connectivity.md#variable-discovery), so variables are added automatically. The first Variable Discovery run is triggered as soon as connection details are saved.

{% hint style="warning" %}
After Variable Discovery completes, no data is being recorded yet. You first need to select the [variables](/en/variable-mapping/contextualisation.md) to record. Follow our variable onboarding flow.
{% endhint %}
{% endstep %}
{% endstepper %}

## See also

* [Tips & practical notes](/en/connect/ot-connectivity/supported-industrial-protocols/s7+/known-issues.md): notes on operating the S7+ Connector and how to handle common effects.