> For the complete documentation index, see [llms.txt](https://docs.enlyze.com/llms.txt). Markdown versions of documentation pages are available by appending `.md` to page URLs; this page is available as [Markdown](https://docs.enlyze.com/en/integrations/grafana/advanced-api/02-api-queries.md).
# 02 API Queries
API queries for production data, OEE metrics, and data joins in Grafana.
In this tutorial you will learn how to query production data with dynamic time ranges, extract OEE metrics, and join data from multiple queries:
## What you will learn
* Use Grafana's time range in API queries
* Query production runs with OEE metrics
* Extract nested JSON values with JSONata
* Combine data from multiple machines
* Join production runs with product data
## Prerequisites
* Completed [Introduction to the ENLYZE API](/en/integrations/grafana/advanced-api/01-introduction.md)
* Understanding of GET requests and the root selector `$.data`
***
## Dynamic time ranges
In the [introduction](/en/integrations/grafana/advanced-api/01-introduction.md) you queried fixed endpoints. For production data you need a dynamic time range that updates with Grafana's time picker.
| Variable | Description |
| -------------------- | ------------------------ |
| `${__from:date:iso}` | Start time in ISO format |
| `${__to:date:iso}` | End time in ISO format |
These variables are automatically replaced with the current time range of the dashboard.
***
## Querying production runs
The `production-runs` endpoint returns production runs including OEE metrics.
### Configure the query
1. Create a new panel with the **Table** visualization
2. Select the data source **ENLYZE API**
3. Configure the query:
| Setting | Value |
| ------- | ----------------- |
| Type | JSON |
| Parser | Backend |
| Source | URL |
| Format | Table |
| Method | GET |
| URL | `production-runs` |
4. Expand **Headers, Request params** and add the following under **URL Query Params**:
| Key | Value |
| --------- | -------------------------------------- |
| `machine` | `141e0927-62b3-4e76-8398-ad82d20f397f` |
| `start` | `${__from:date:iso}` |
| `end` | `${__to:date:iso}` |
5. Set the **Root selector** to `$.data`
{% hint style="info" %}
Always configure query parameters through the Grafana interface under **Headers, Request params** instead of writing them directly into the URL. This is clearer and avoids encoding issues.
{% endhint %}
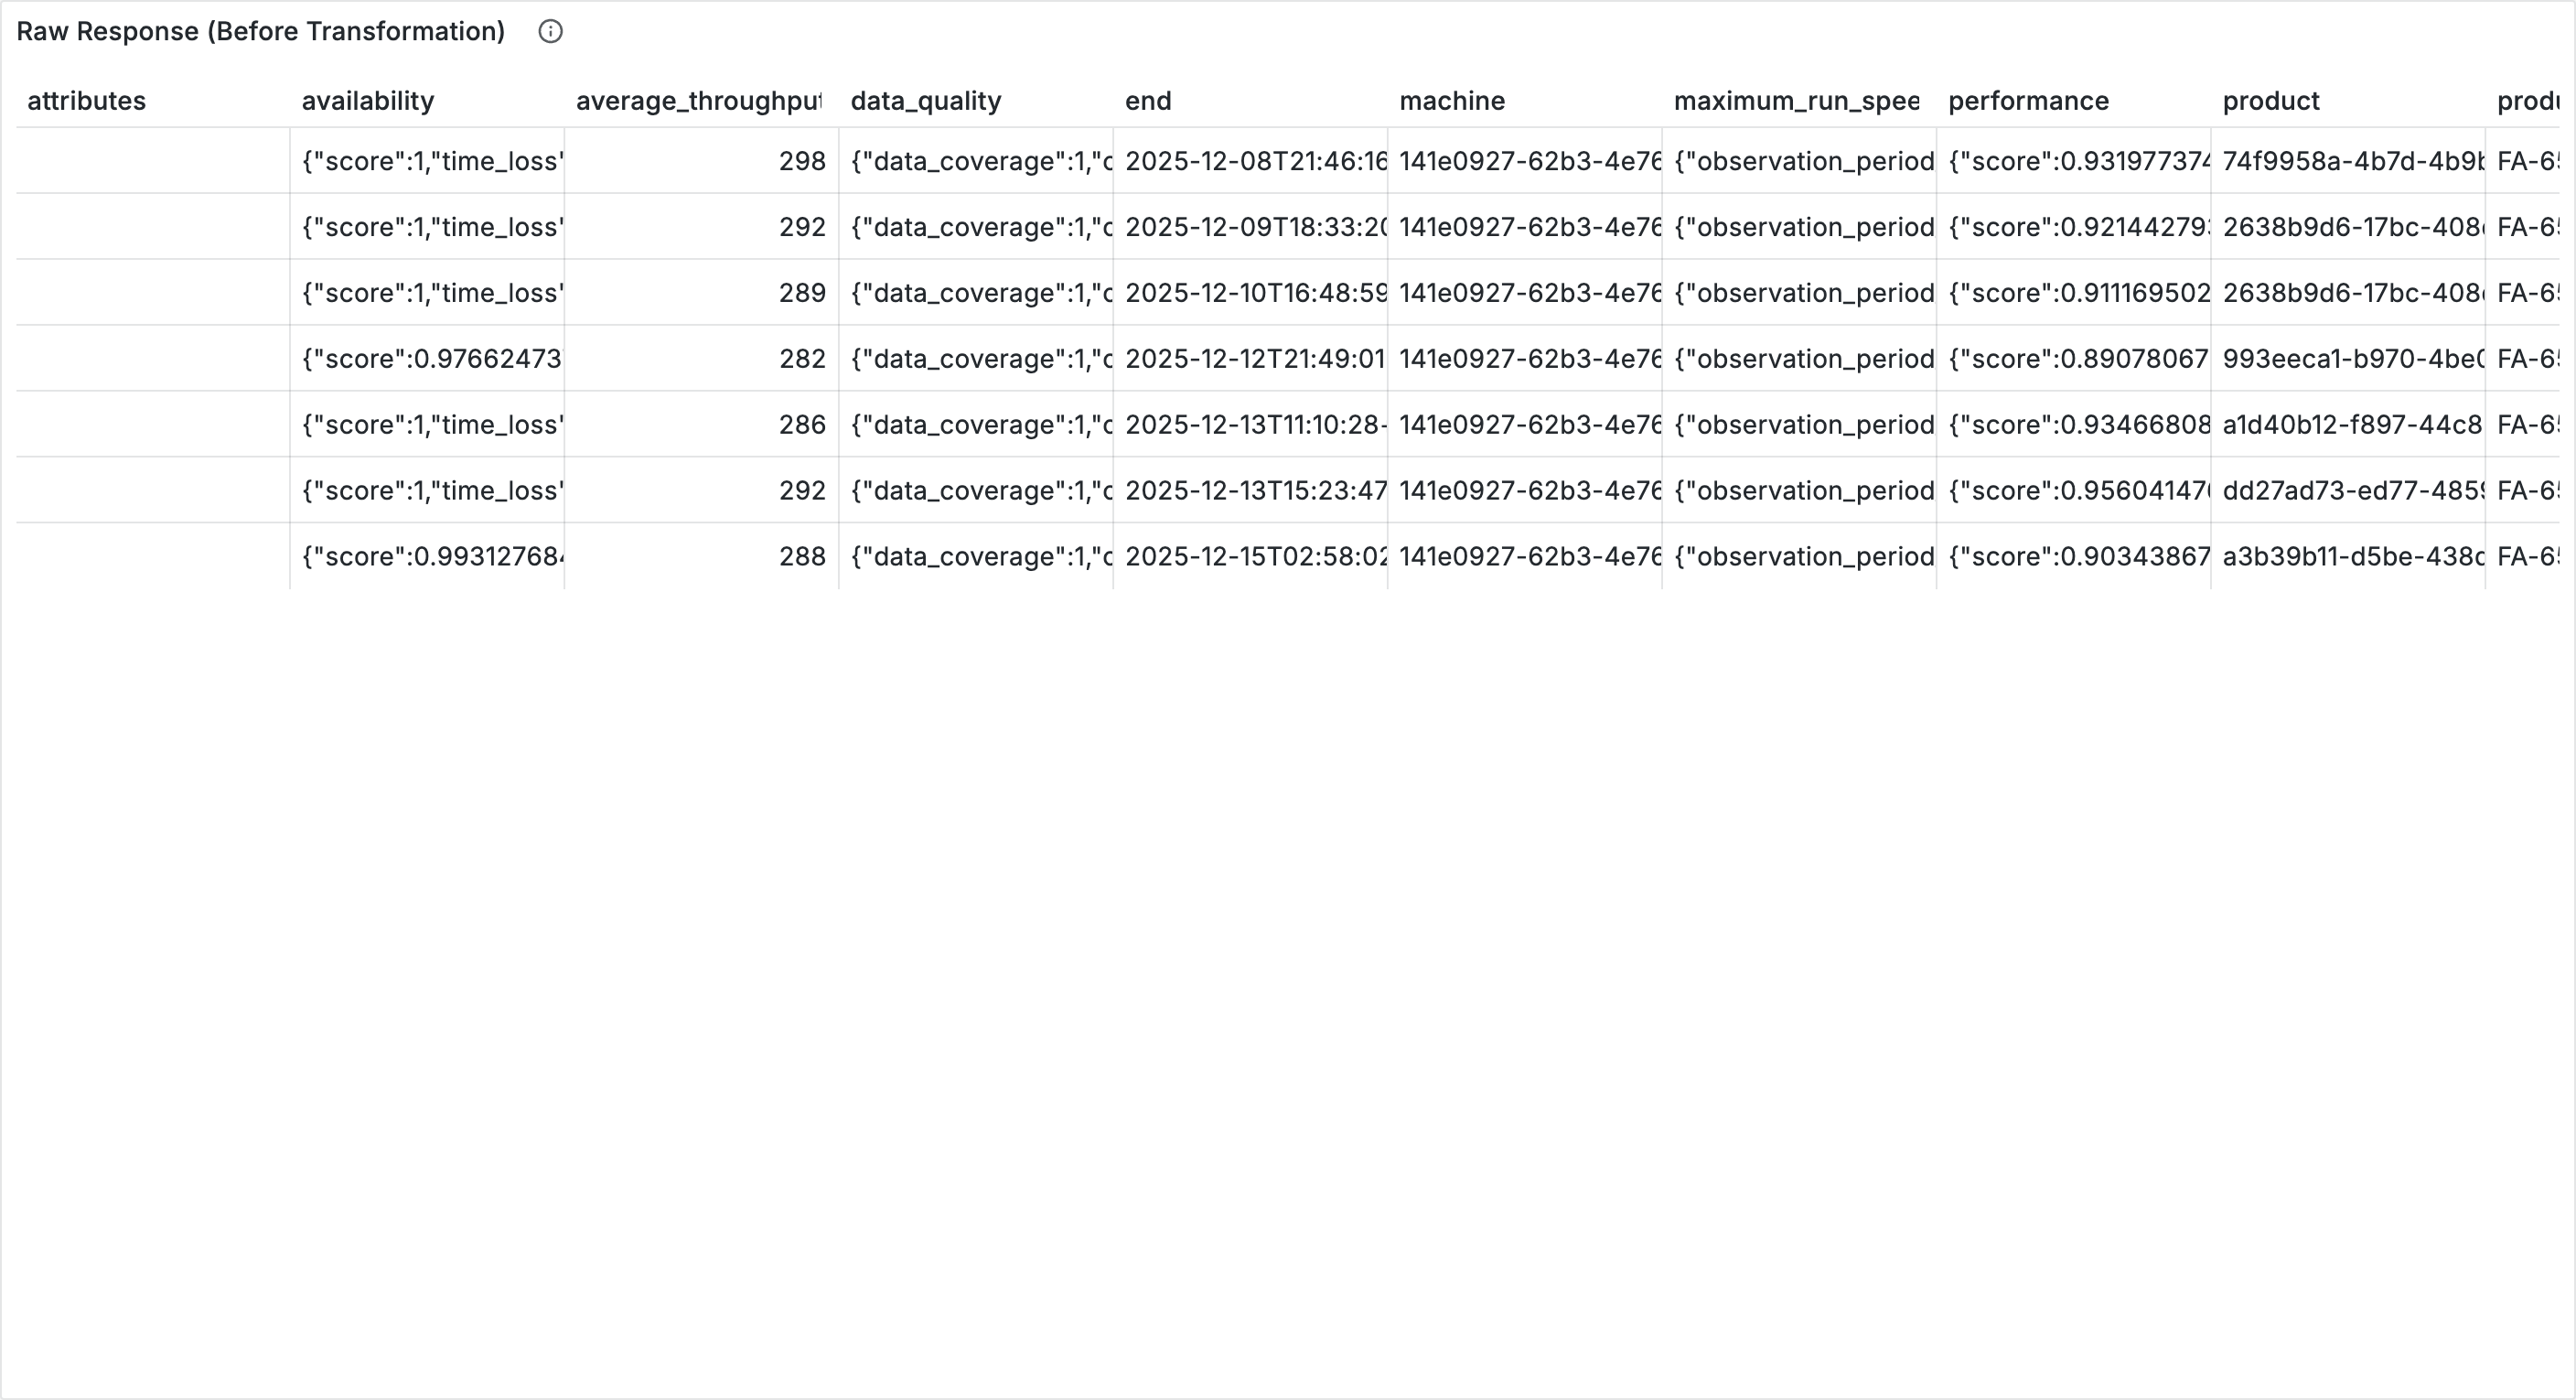
The table shows the raw API response. OEE metrics like `productivity`, `availability`, and `performance` are nested objects. In the next step you will extract these values.
***
## Extracting nested values with JSONata
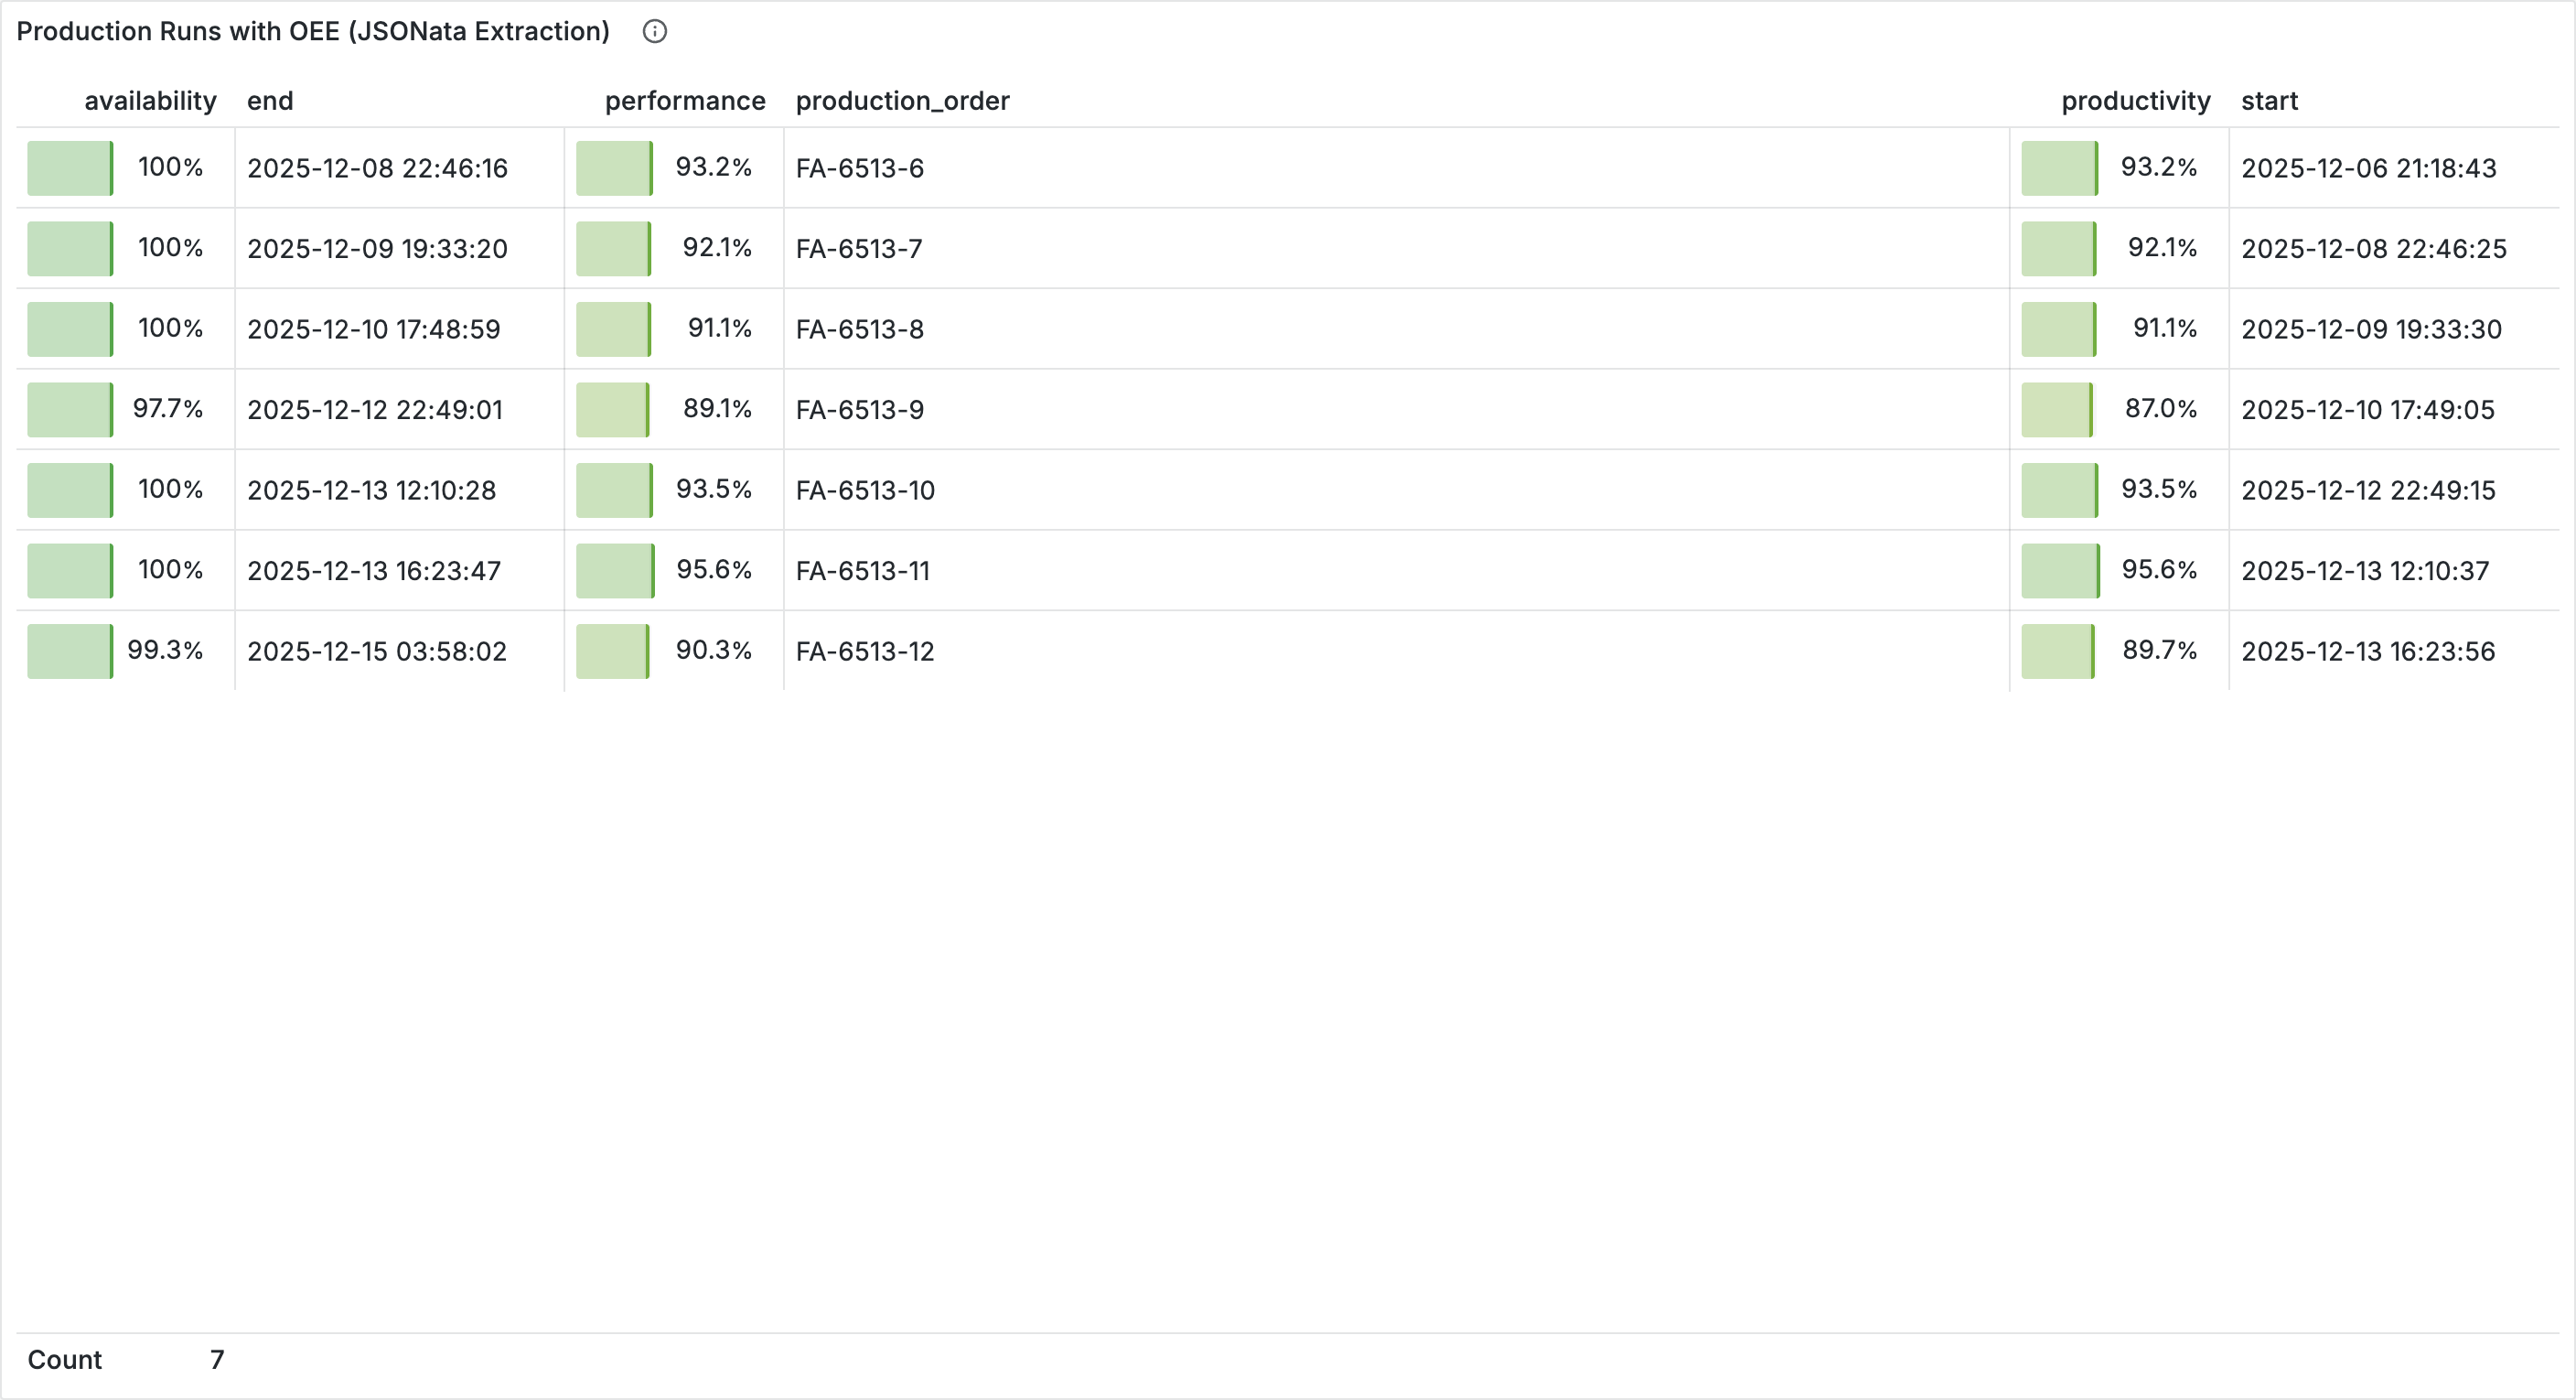
JSONata lets you extract and restructure nested values directly in the root selector. Replace `$.data` with:
```
$.data.{
"production_order": production_order,
"start": start,
"end": end,
"productivity": productivity.score,
"availability": availability.score,
"performance": performance.score,
"quality": quality.score,
"yield": quantity_yield.value
}
```
Each row now contains the extracted OEE scores and the produced quantity (yield).
### JSONata basics
| Expression | Description |
| ------------------- | --------------------- |
| `$.data` | Access the data array |
| `field.subfield` | Nested property |
| `{ "name": value }` | Create a new object |
***
## Configuring columns
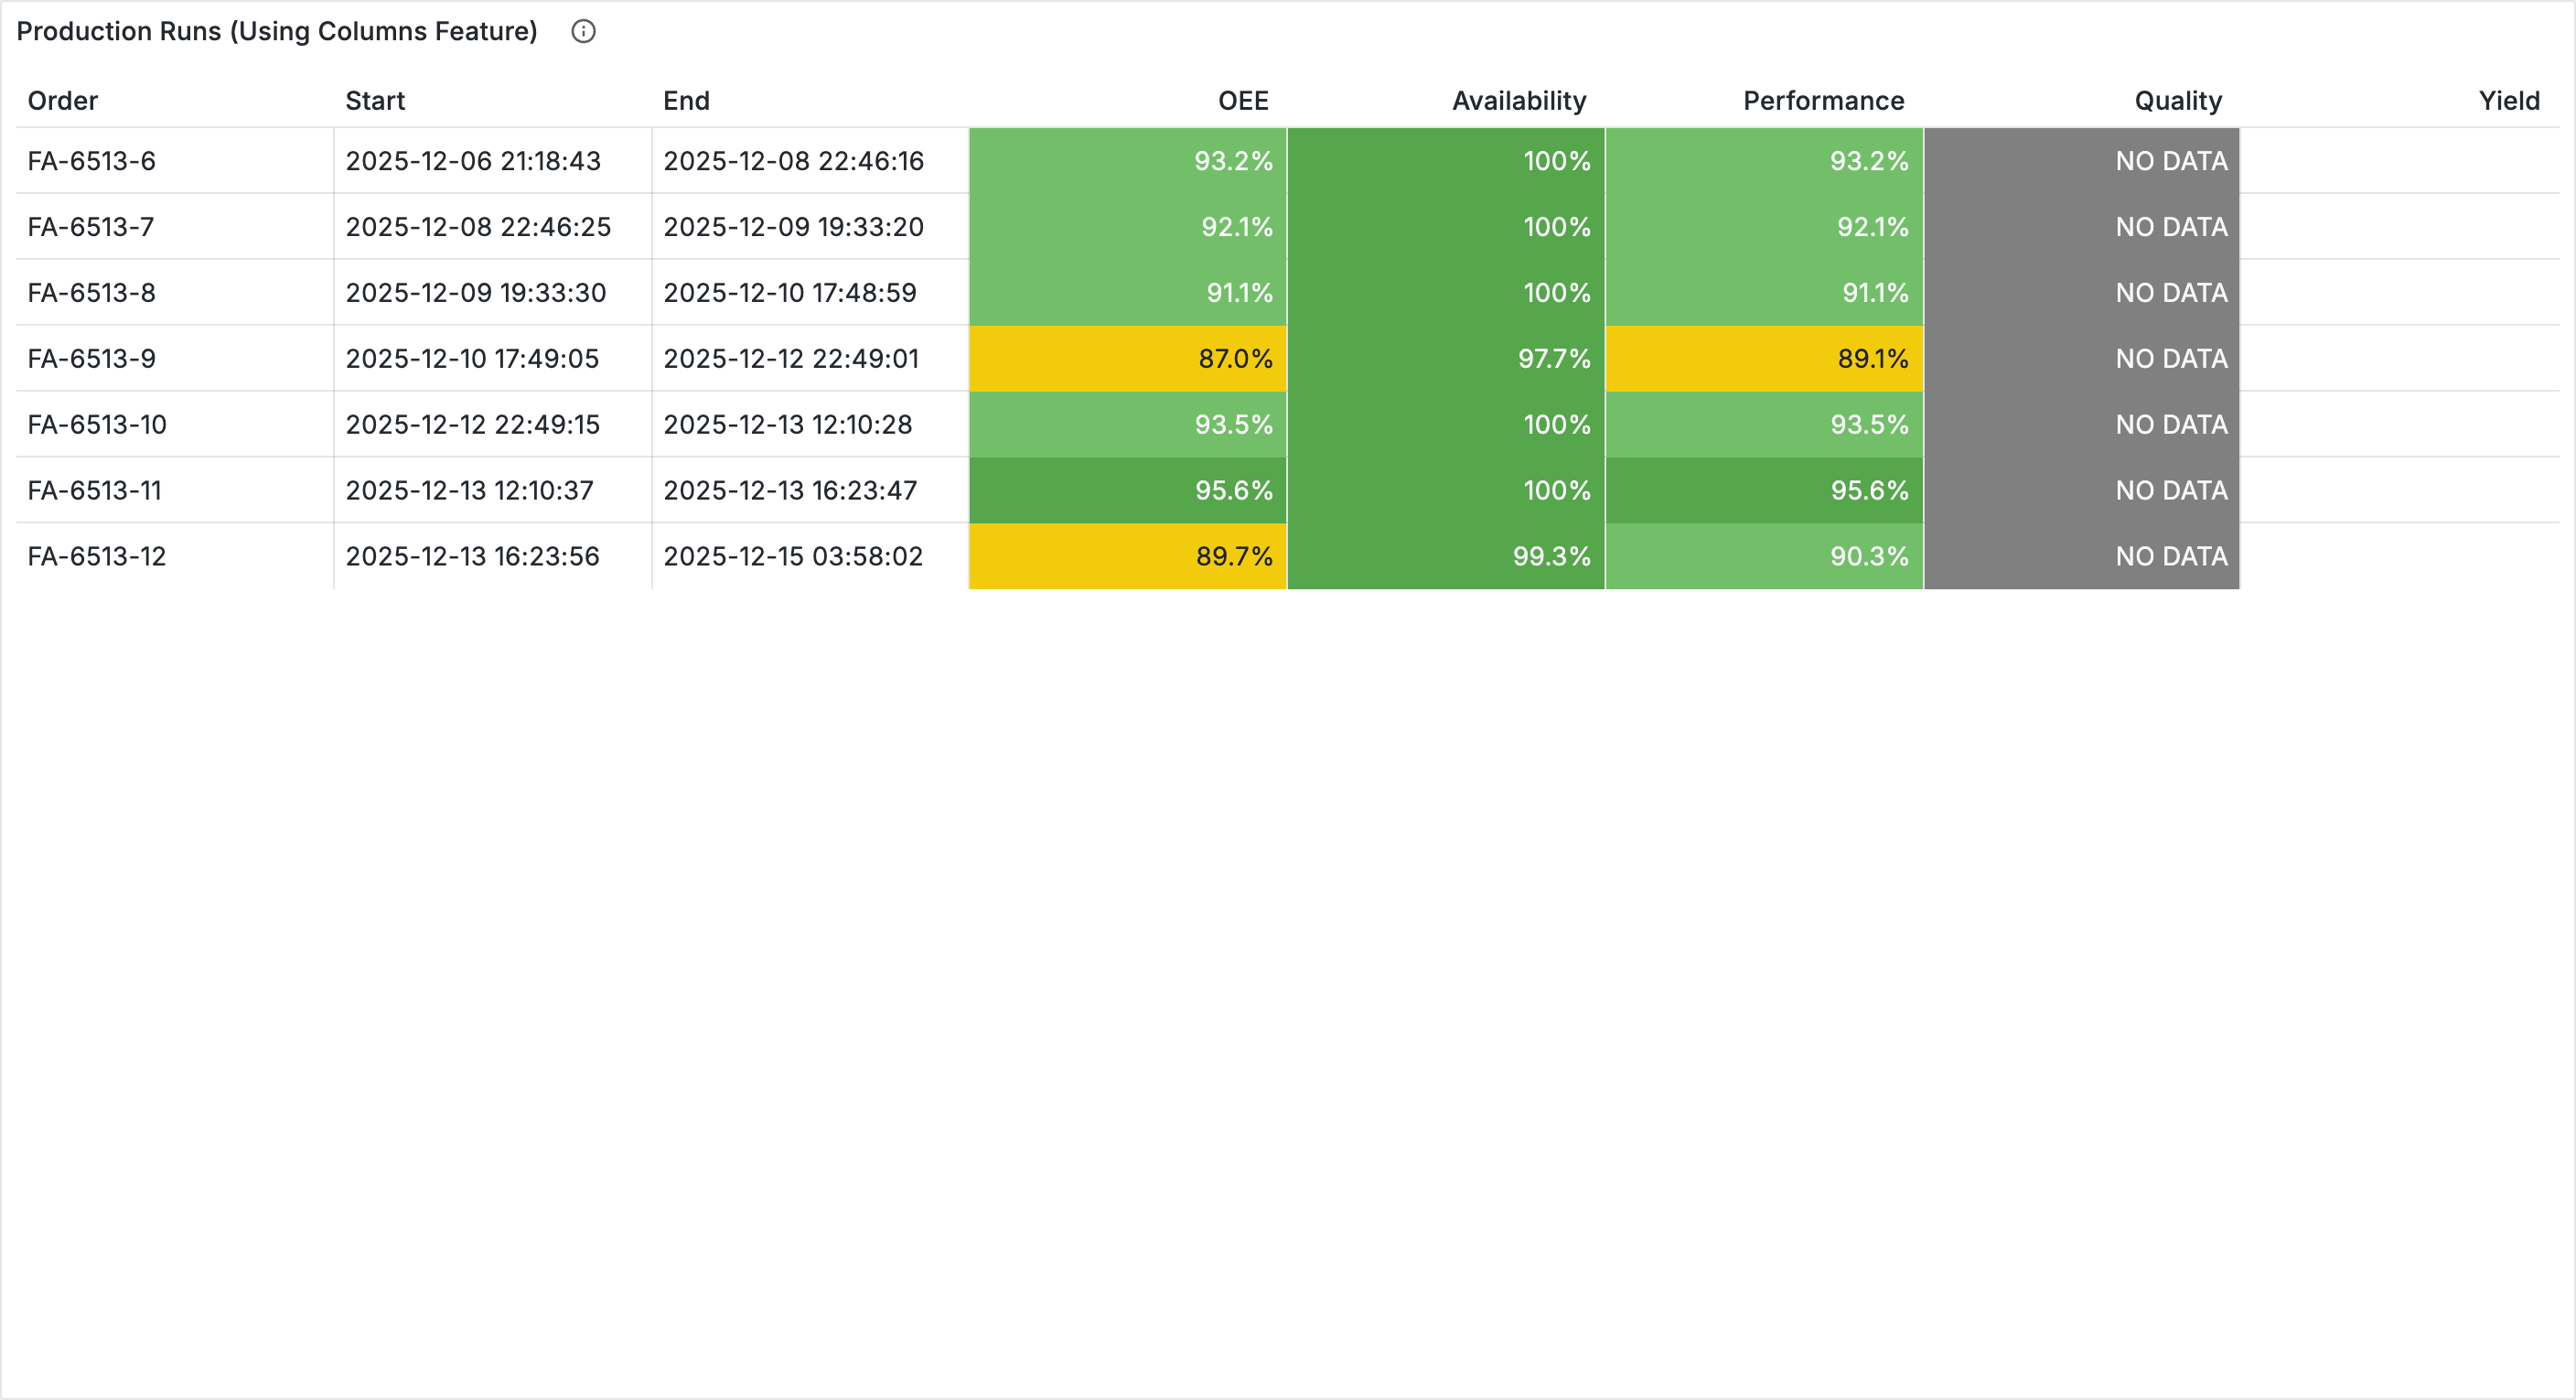
Instead of JSONata, you can also use the **Columns** feature of the Infinity query. Expand **Parsing options & Result fields** and add the following under **Columns**:
| Selector | Title | Type |
| ---------------------- | ------------ | --------- |
| `production_order` | Order | String |
| `start` | Start | Timestamp |
| `end` | End | Timestamp |
| `productivity.score` | OEE | Number |
| `availability.score` | Availability | Number |
| `performance.score` | Performance | Number |
| `quality.score` | Quality | Number |
| `quantity_yield.value` | Yield | Number |
### Highlighting OEE values with color
For the OEE columns, colored cells work well. Add a **Field override** for fields matching the regex `/OEE|Availability|Performance|Quality/`:
* **Unit**: Percent (0.0-1.0)
* **Min**: 0, **Max**: 1
* **Cell type**: Color background
* **Value mappings**: Color gradients from red (< 60%) through orange and yellow to green (> 95%), and `null` mapped to "NO DATA" in grey
{% hint style="info" %}
For machines without quality data, the Quality column shows "NO DATA". In this case, the OEE (Productivity) is calculated from Availability and Performance. Learn more in the [OEE documentation](https://github.com/enlyze/enlyze-docs/blob/main/en/konzepte/oee-verstehen/das-konzept-oee.md).
{% endhint %}
***
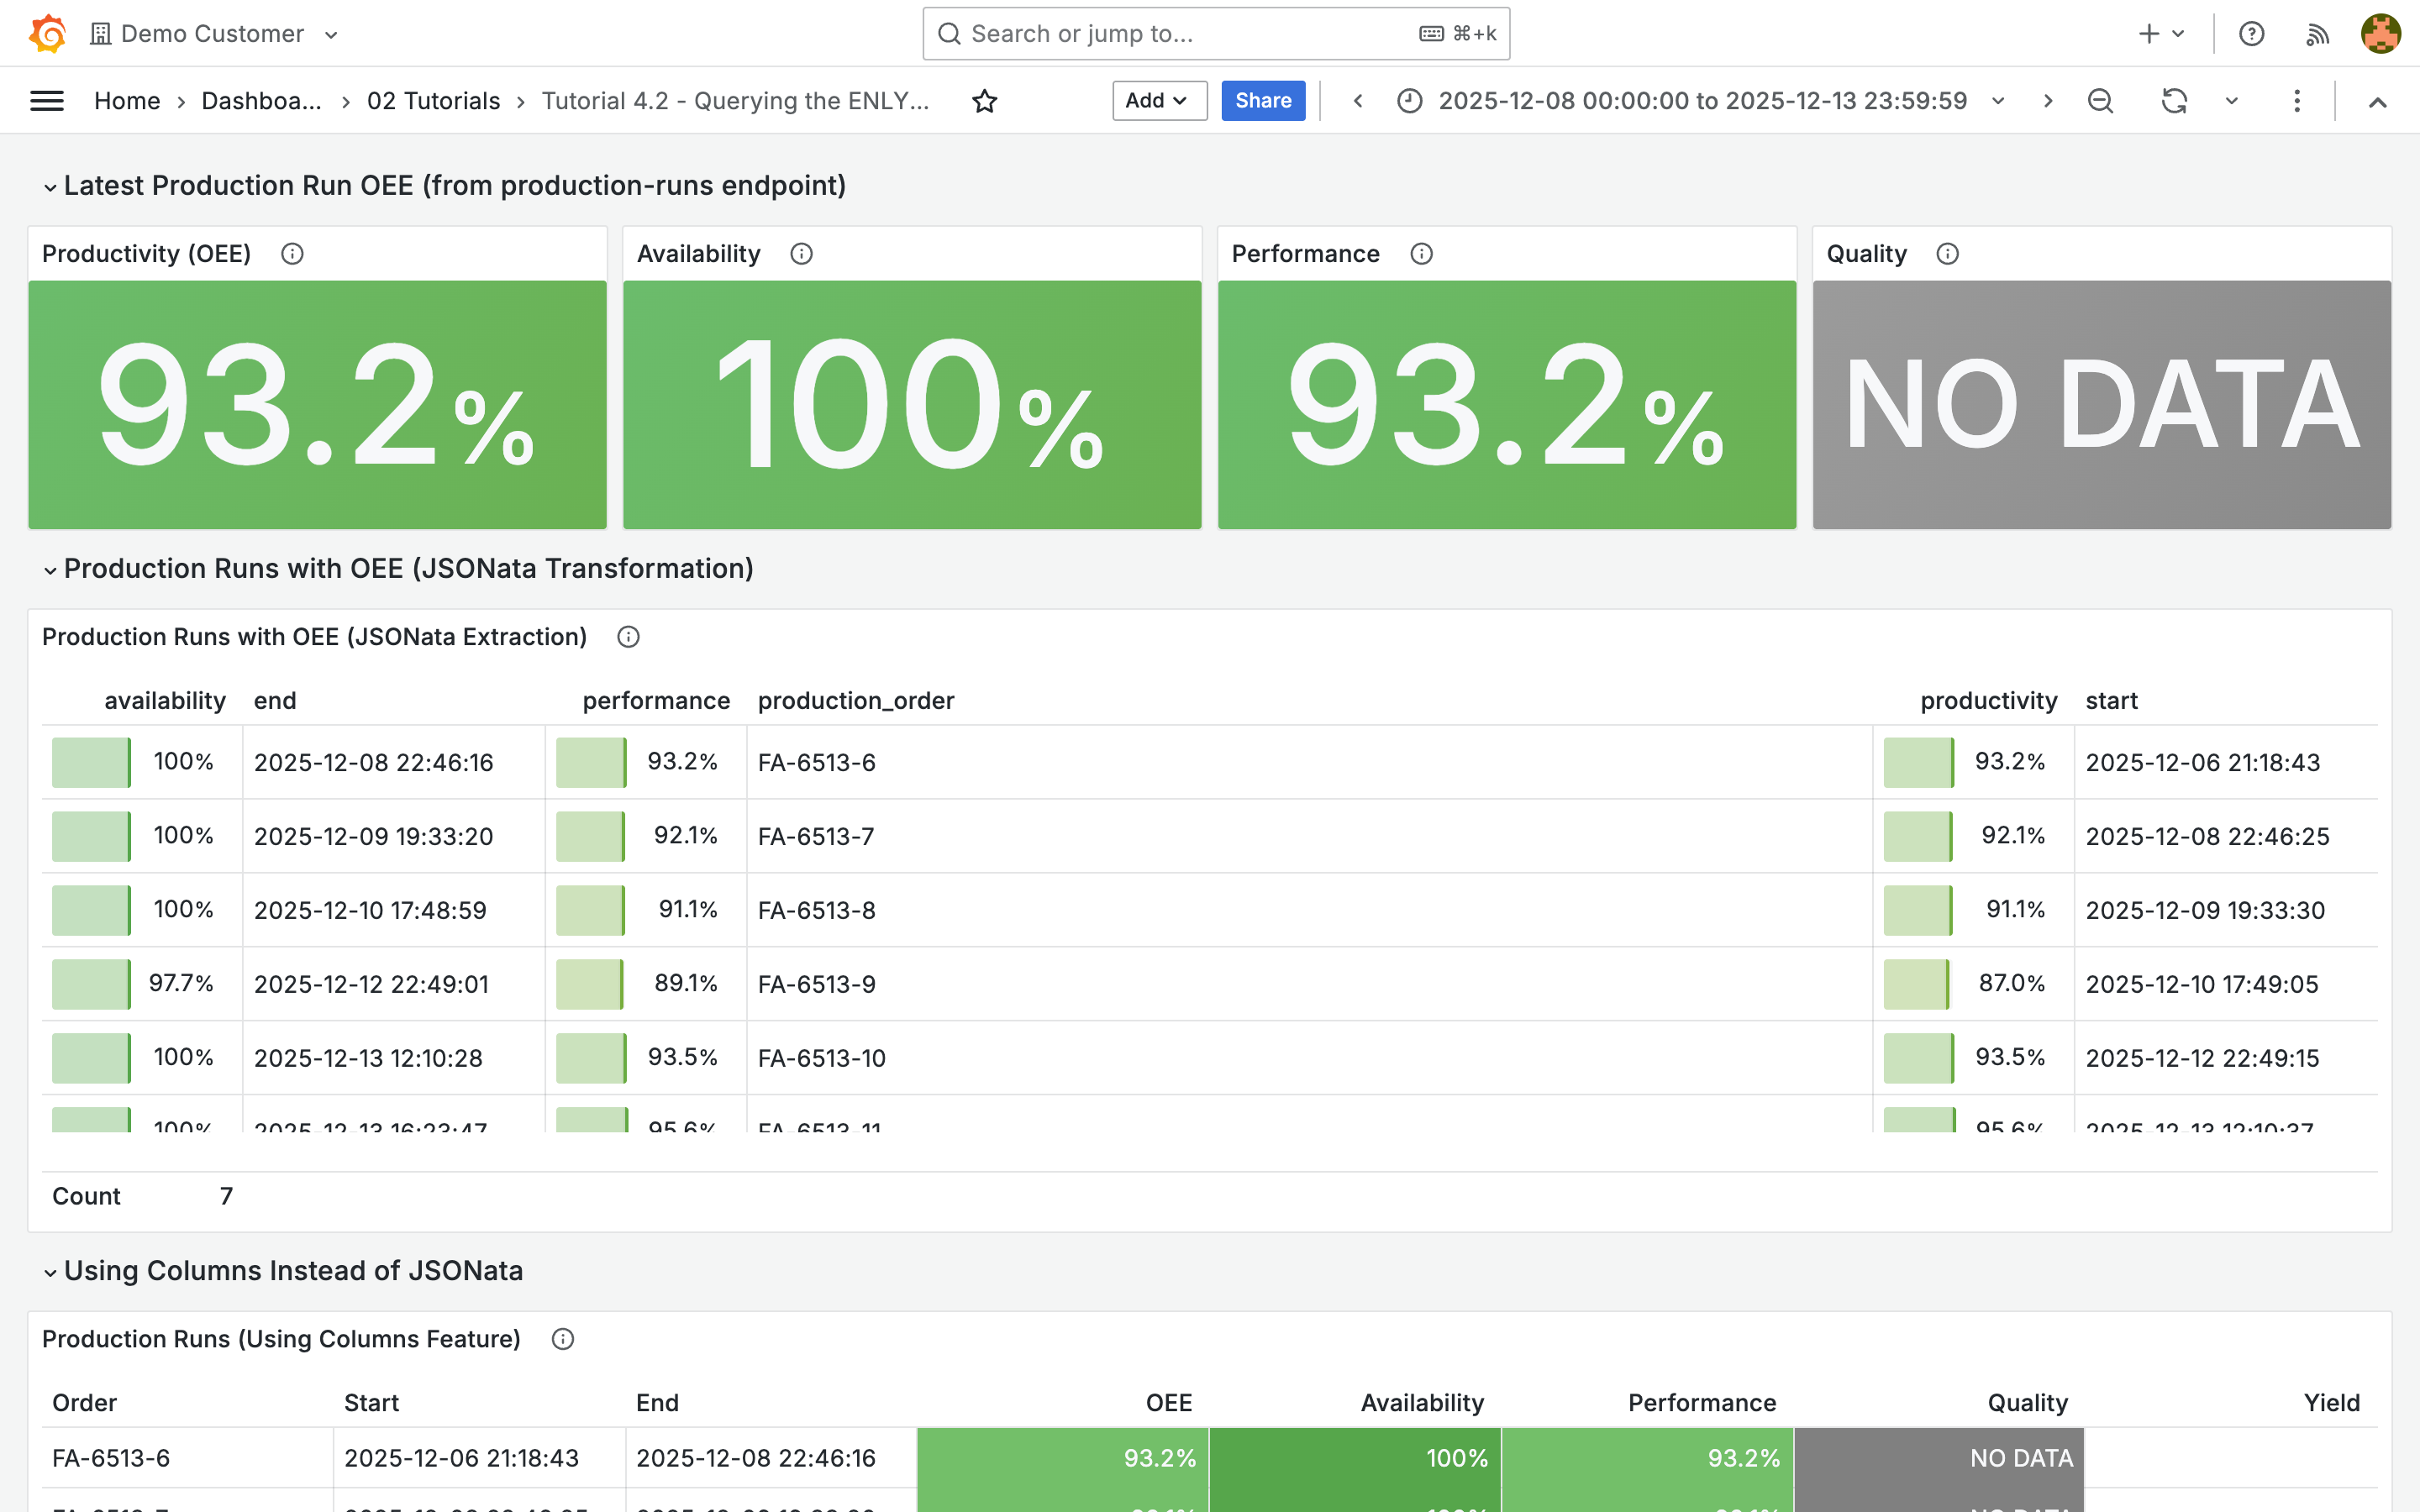
## OEE as a stat panel
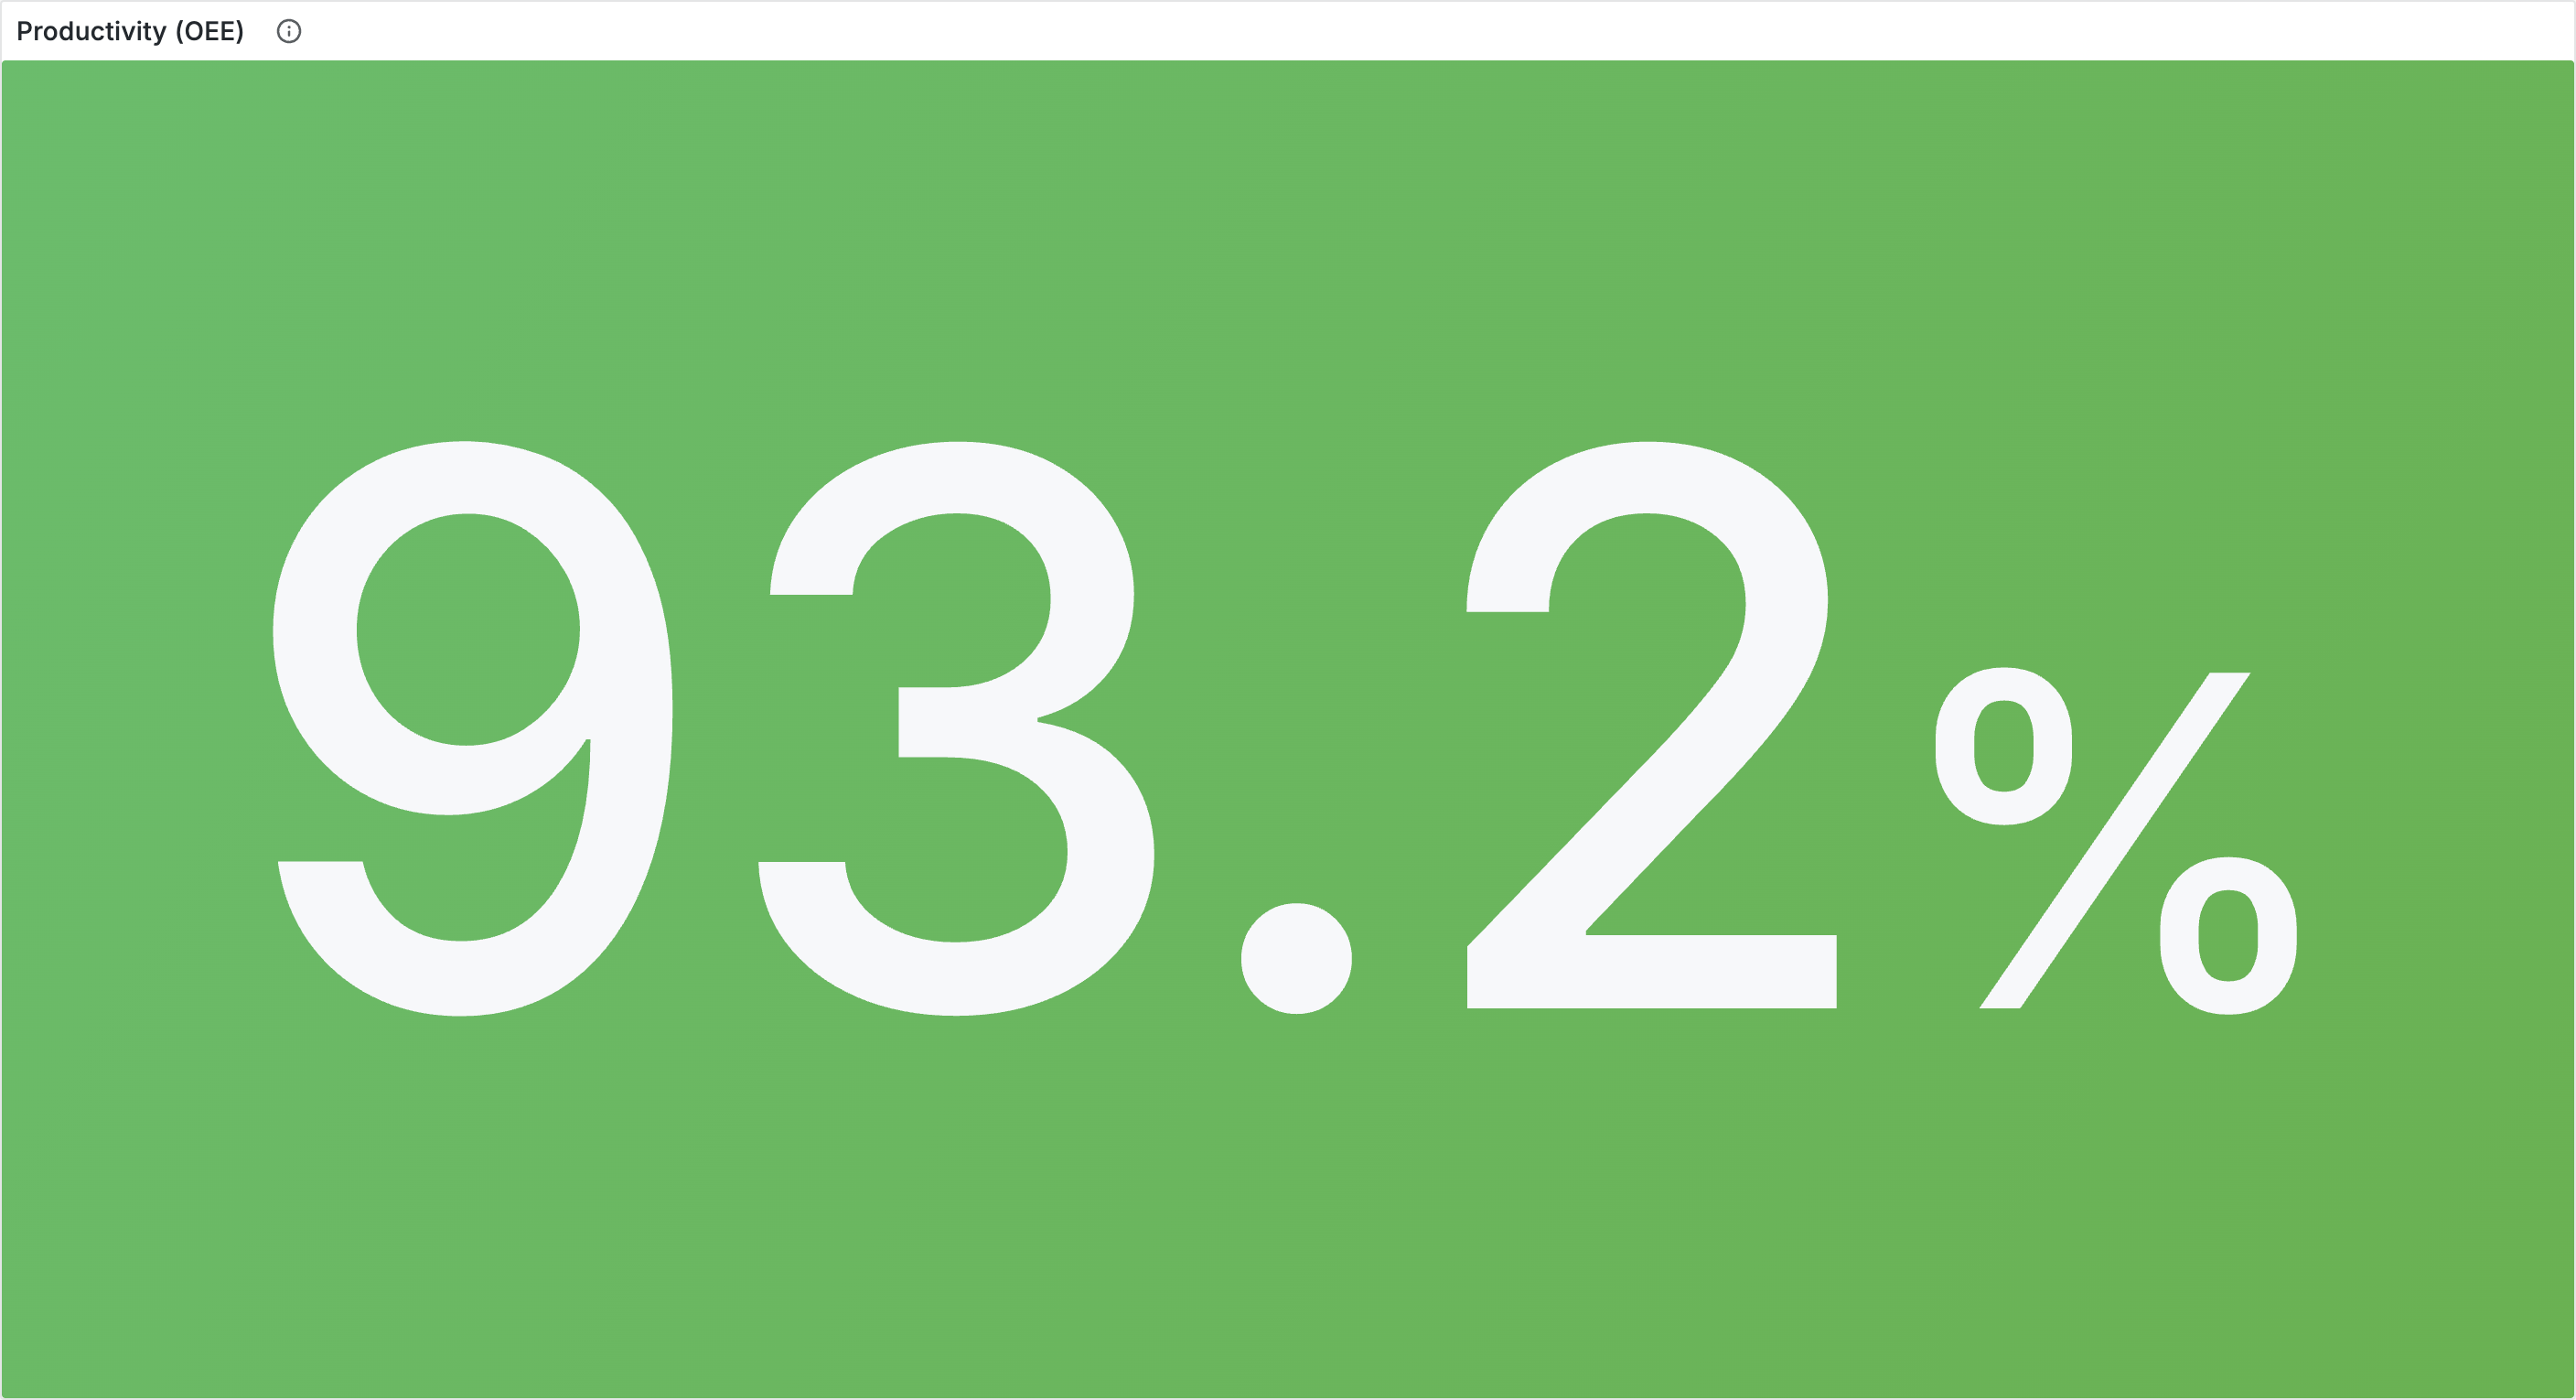
You can also display the OEE of the latest production run as a stat panel:
1. Create a new panel with **Stat** visualization
2. Configure the same `production-runs` query with the query params as above
3. Set the root selector to `$.data[0].productivity.score`
4. Set unit to **Percent (0.0-1.0)**, color mode to **Background**
5. Thresholds: red (base), yellow (0.6), green (0.8)
Following the same pattern, create additional panels for Availability (`$.data[0].availability.score`), Performance (`$.data[0].performance.score`), and Quality (`$.data[0].quality.score`). For Quality, configure a value mapping for `null` mapped to "NO DATA", since not all machines provide quality data.
***
## Combining production runs from multiple machines
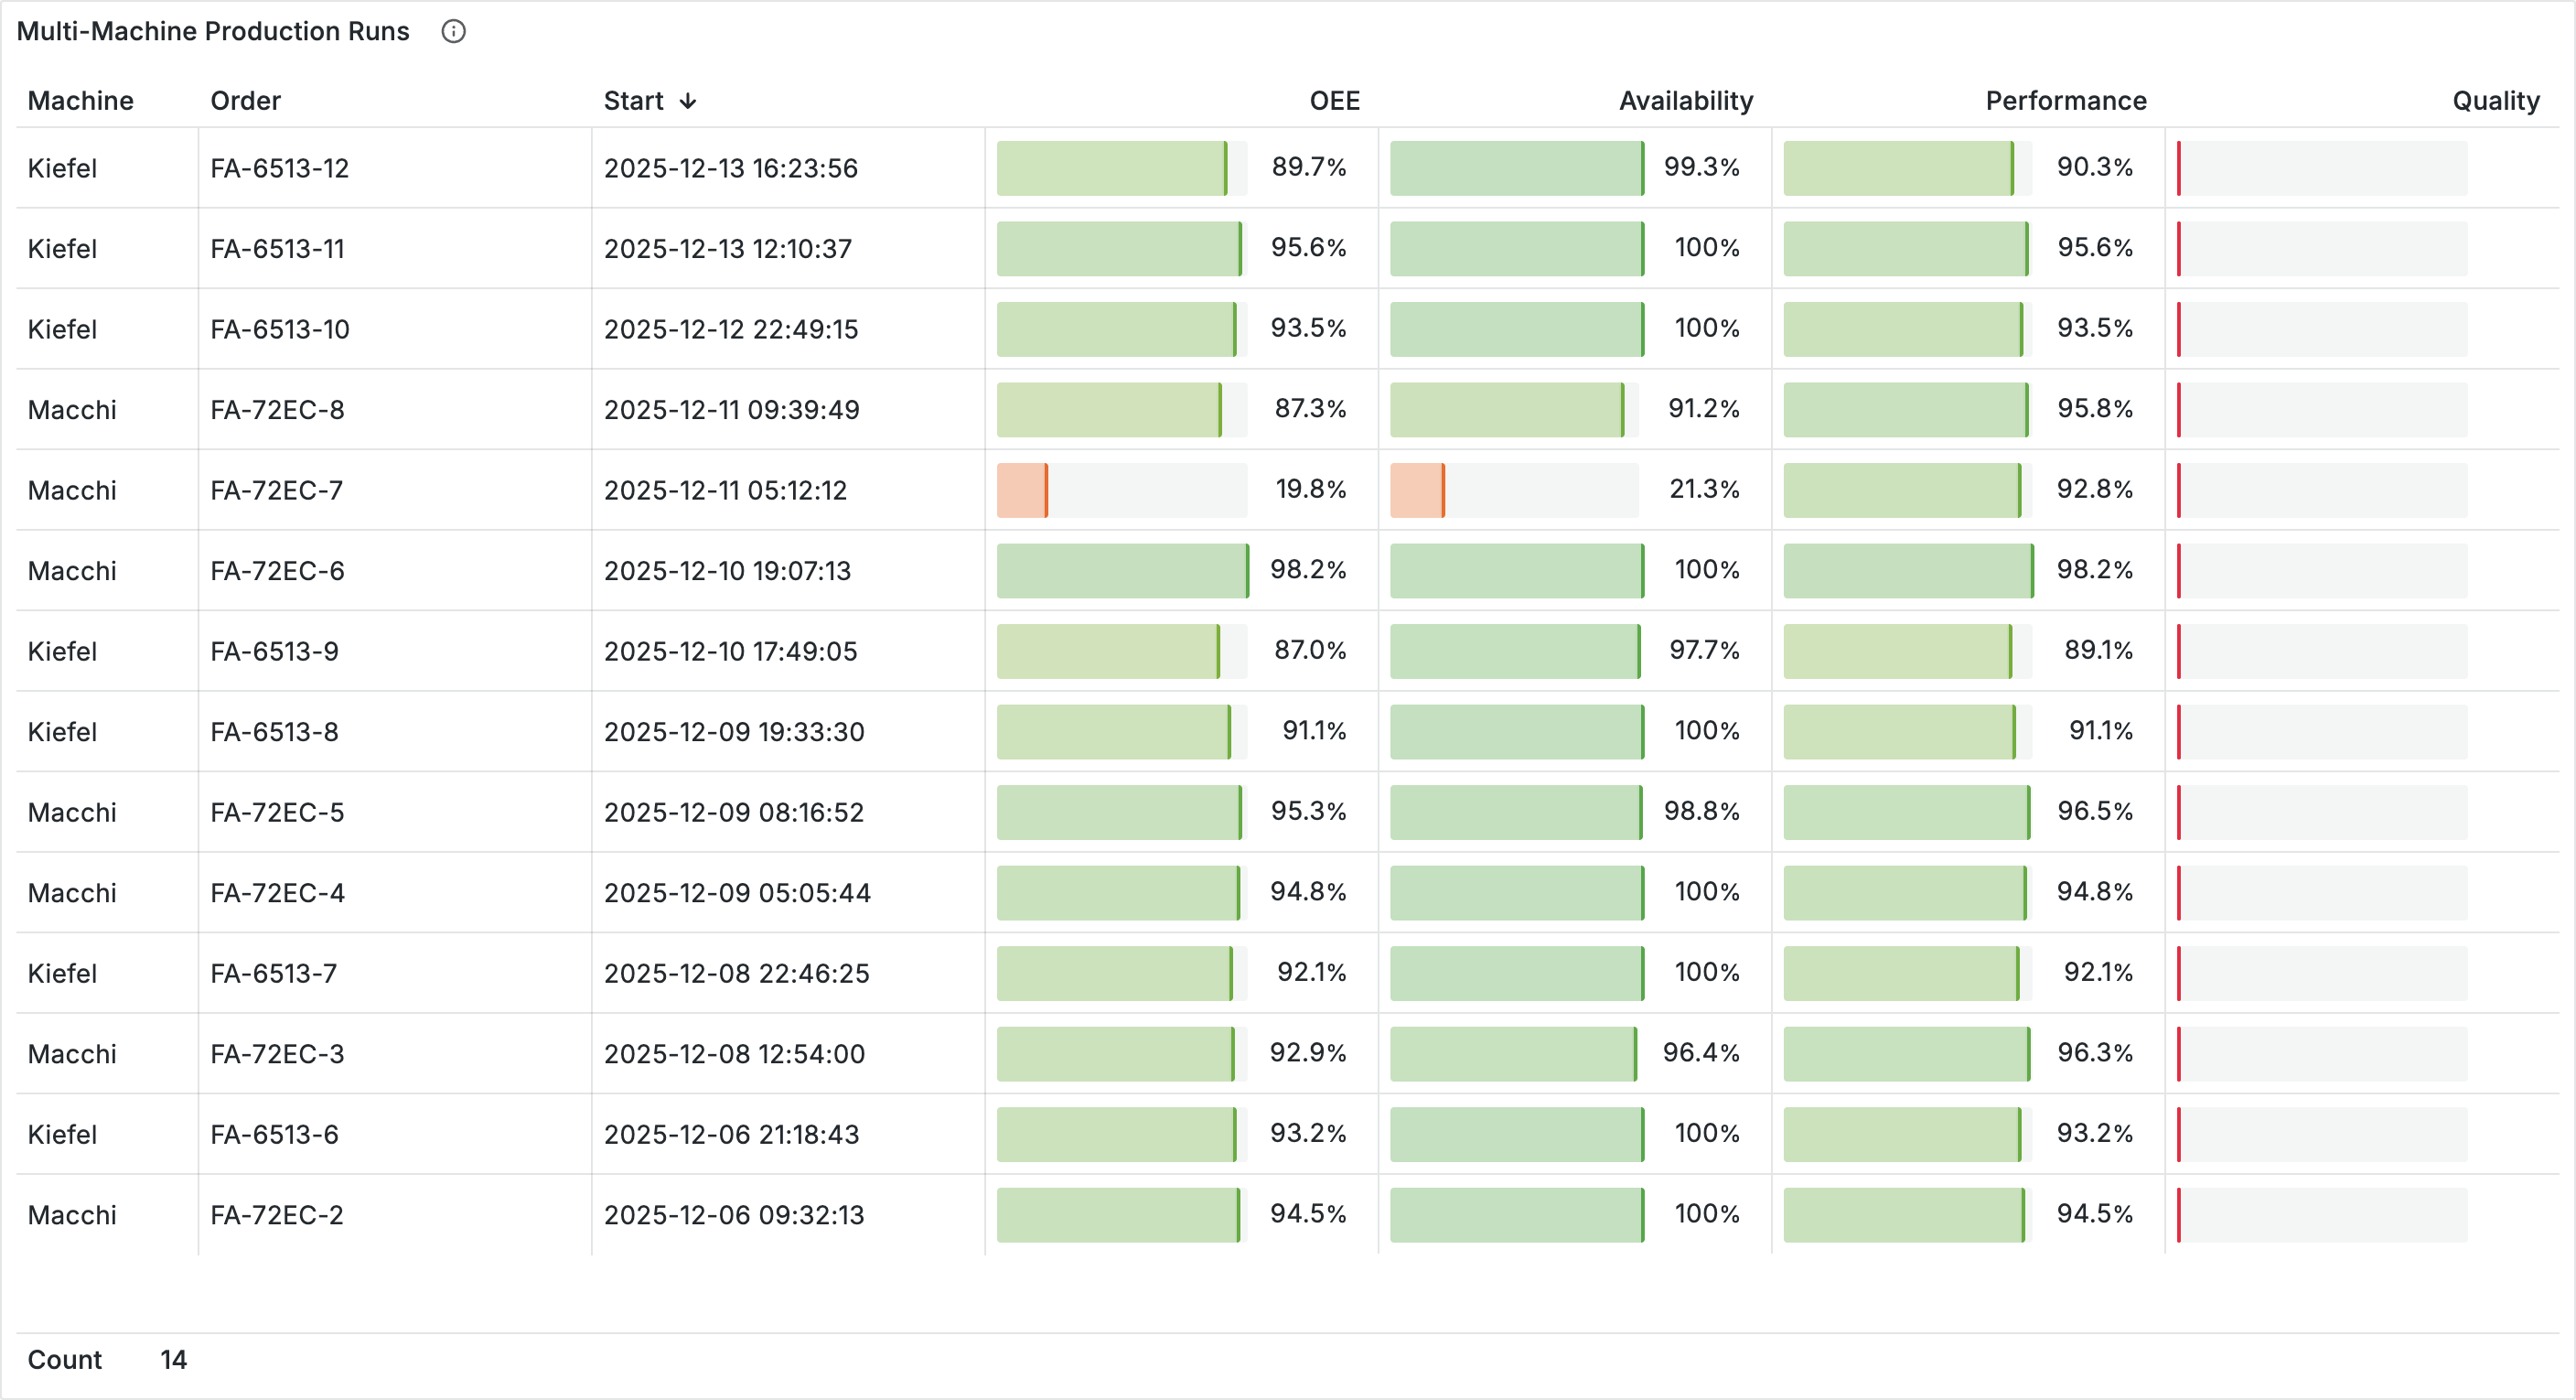
To display production runs from multiple machines in a single table, configure two queries with a computed column for the machine name in each.
**Query A (Kiefel):**
| Setting | Value |
| ------------ | -------------------------------------------------------------------------------------- |
| URL | `production-runs` |
| Query Params | `machine` = `141e0927-...`, `start` = `${__from:date:iso}`, `end` = `${__to:date:iso}` |
Under **Computed columns**: Selector `"Kiefel"`, Title `Machine`
**Query B (Macchi):**
| Setting | Value |
| ------------ | -------------------------------------------------------------------------------------- |
| URL | `production-runs` |
| Query Params | `machine` = `cc0d2dcb-...`, `start` = `${__from:date:iso}`, `end` = `${__to:date:iso}` |
Under **Computed columns**: Selector `"Macchi"`, Title `Machine`
Add a **Merge** transformation to combine both queries into a single table.
***
## Joining with product data
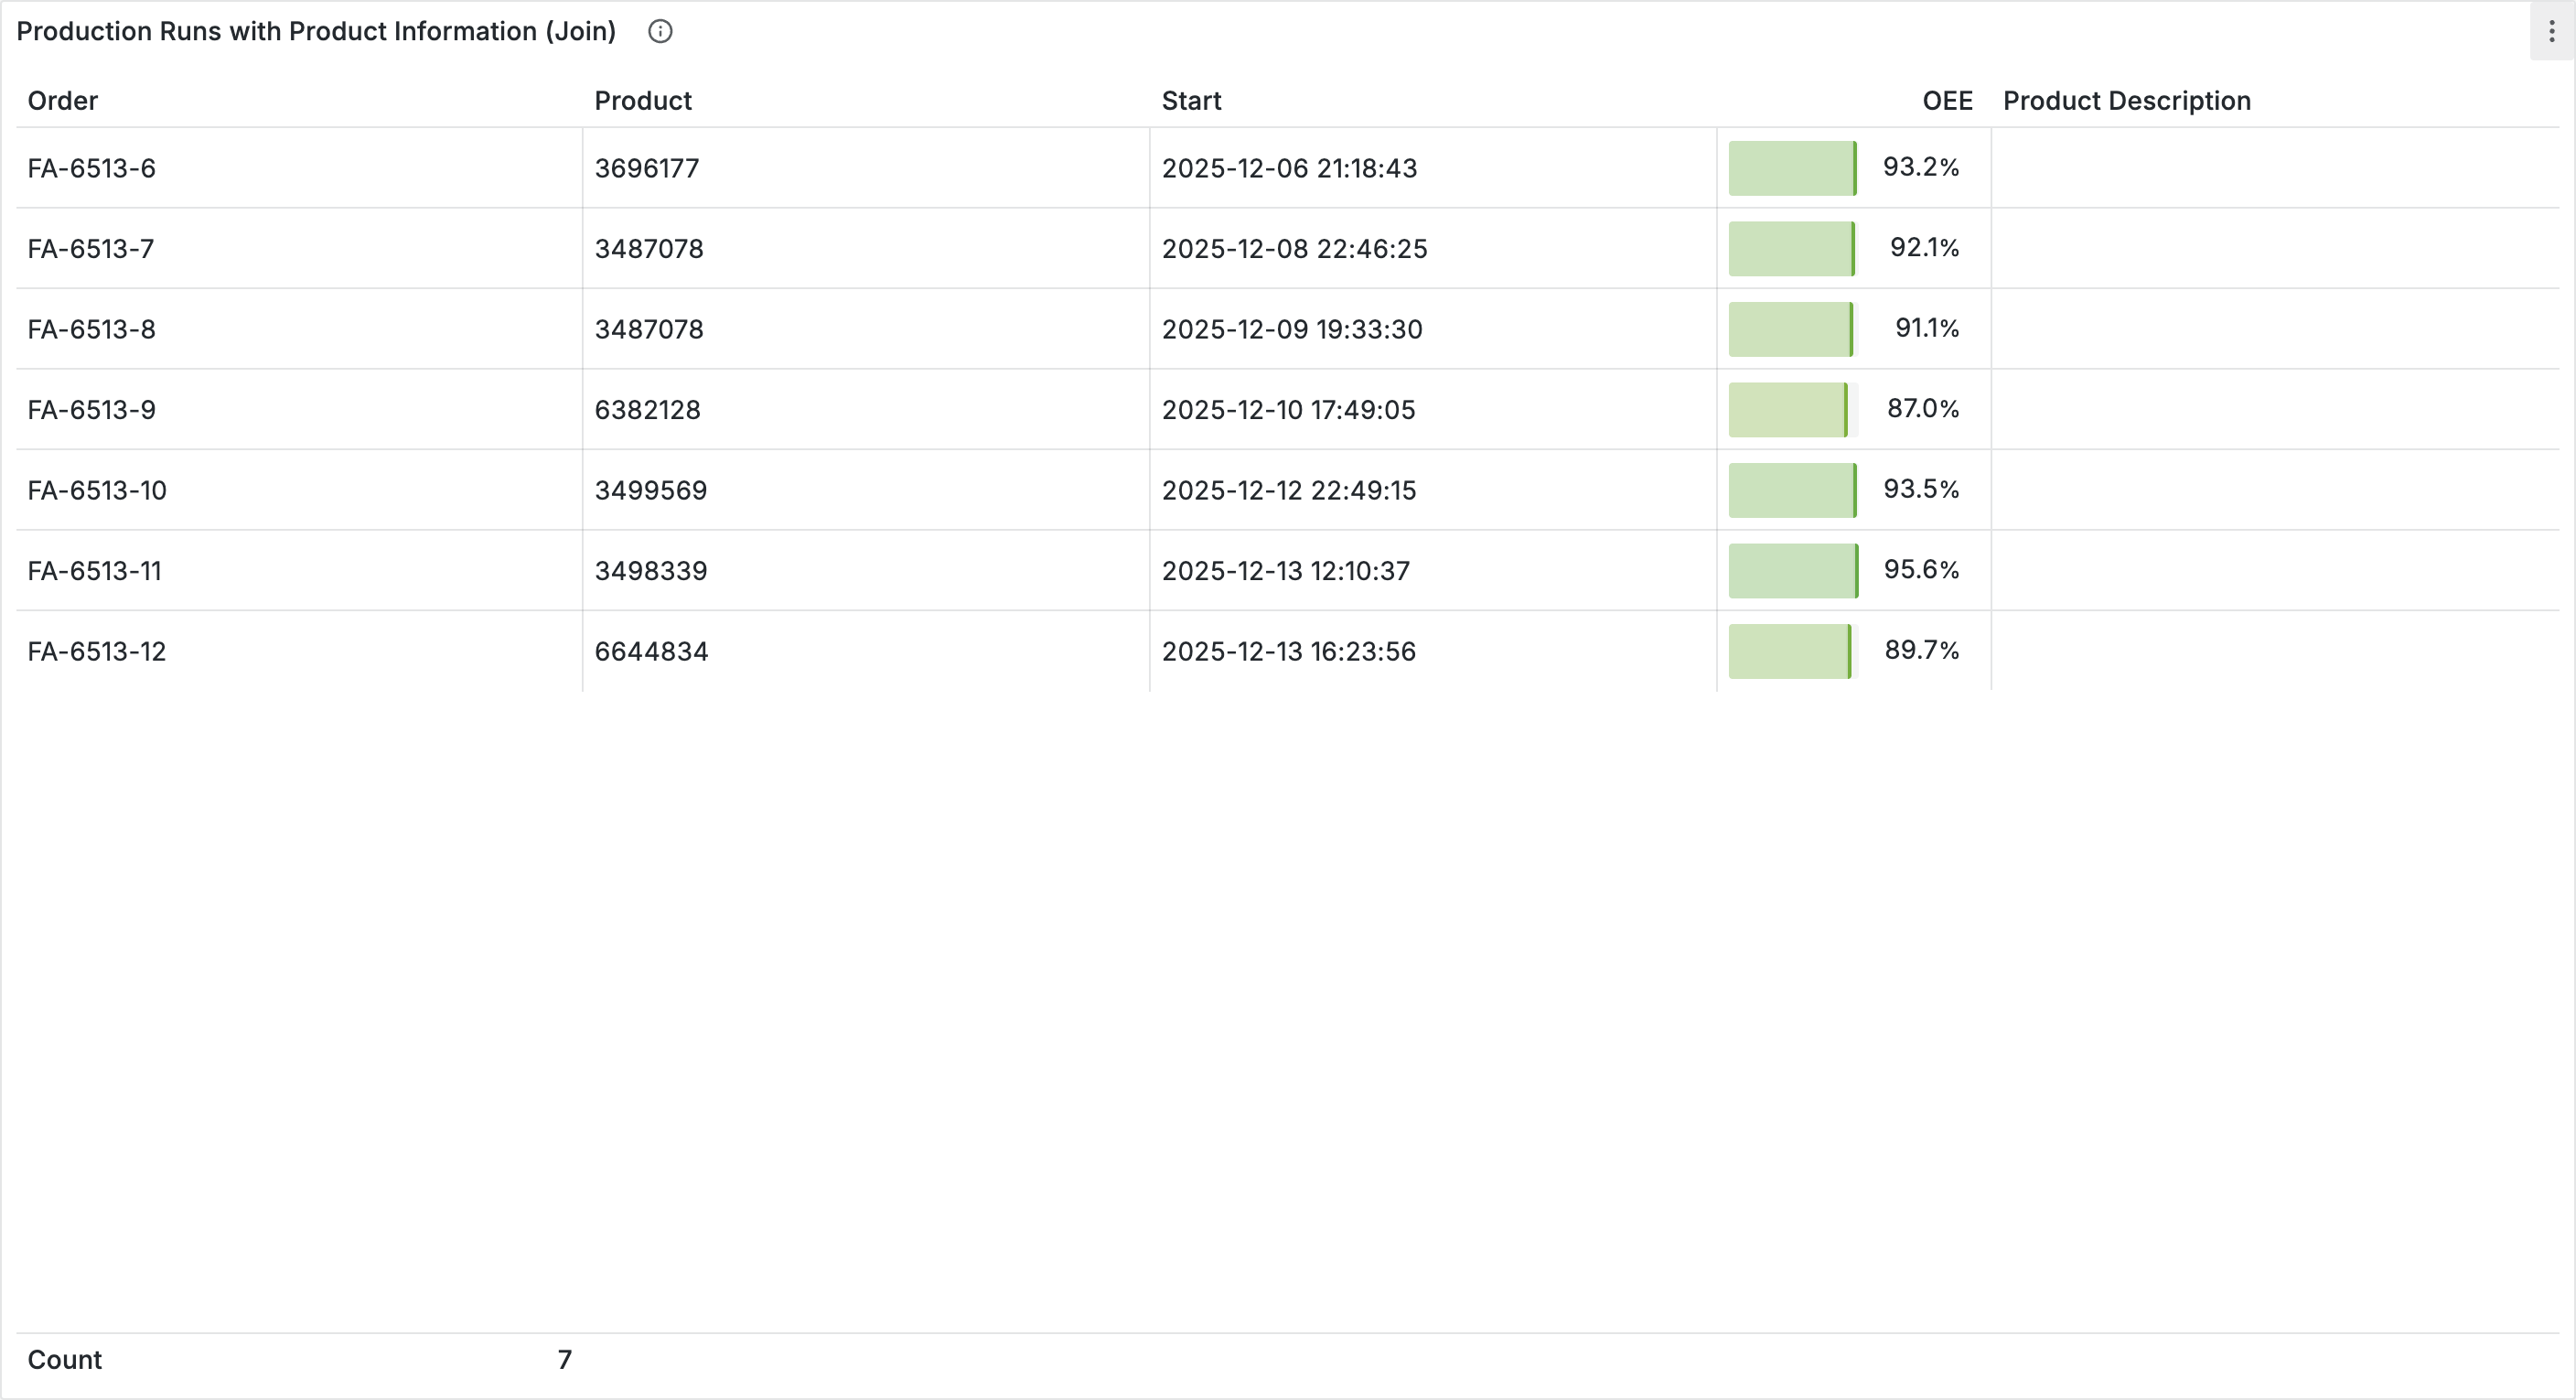
Production runs only contain a product UUID. To display the product name, join the data with the `products` endpoint.
### Create two queries
**Query A (production runs):**
| Setting | Value |
| ------------ | -------------------------------------------------------------------------------------- |
| URL | `production-runs` |
| Query Params | `machine` = `141e0927-...`, `start` = `${__from:date:iso}`, `end` = `${__to:date:iso}` |
Columns: `production_order` as Order, `product` as product\_uuid, `start` as Start, `productivity.score` as OEE
**Query B (products):**
| Setting | Value |
| ------------- | ---------- |
| URL | `products` |
| Root selector | `$.data` |
Columns: `uuid` as product\_uuid, `external_id` as Product ID, `name` as Product Name
**Important:** The join field must have the same column name in both queries (`product_uuid`).
### Join transformation
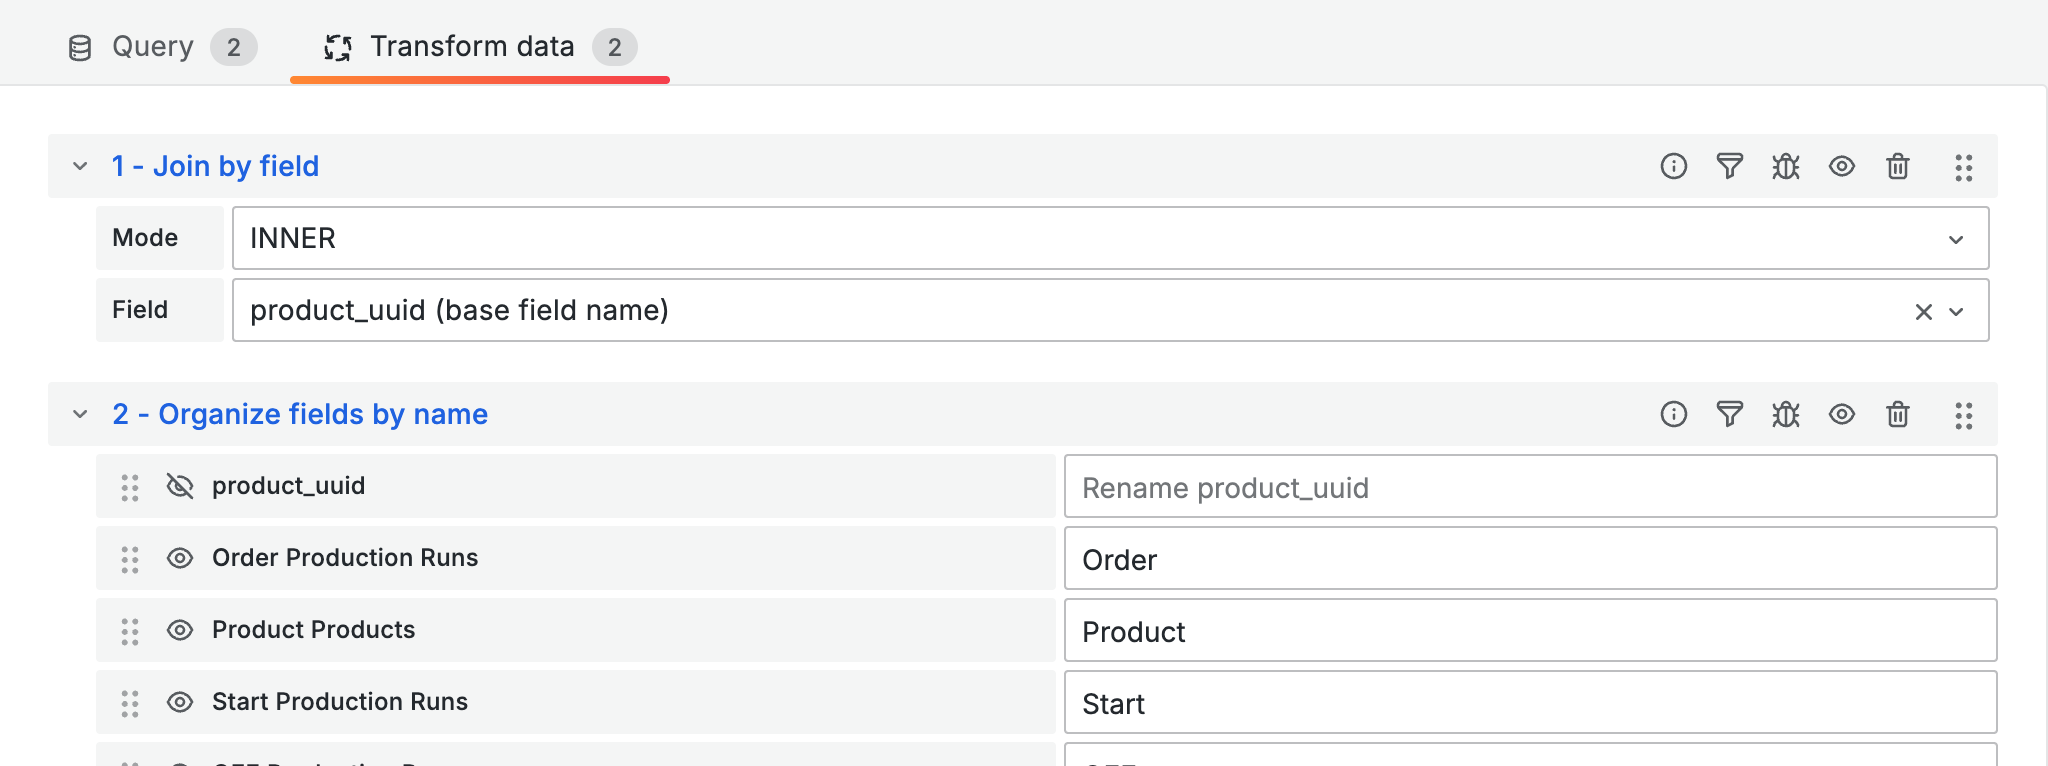
1. Switch to the **Transform** tab
2. Add **Join by field**: Mode **INNER**, Field **product\_uuid**
3. Optional: add **Organize fields** to hide `product_uuid`
***
## Downtimes
Machine downtimes can be queried via the `downtimes` endpoint:
| Setting | Value |
| ------------- | -------------------------------------------------------------------------------- |
| URL | `downtimes` |
| Query Params | `machine` = `{uuid}`, `start` = `${__from:date:iso}`, `end` = `${__to:date:iso}` |
| Root selector | `$.data` |
The API returns the start and end time as well as the downtime reason and its category. Use **Columns** to extract the relevant fields:
| Selector | Title | Type |
| ----------------- | ----------- | --------- |
| `uuid` | Downtime ID | String |
| `start` | Start | Timestamp |
| `end` | End | Timestamp |
| `reason.name` | Reason | String |
| `reason.category` | Category | String |
***
## Tips
* **Always test with a table**: Raw data is easier to read in tables. Only switch to other visualizations after the query works.
* **Use query params**: Configure parameters through the Grafana interface instead of writing them directly into the URL.
* **Build the root selector incrementally**: Start with `$.data`, check the data structure, then add JSONata.
* **Empty data**: Expand the time range or check whether the machine was running during the selected period.
***
## Next steps
* [**Working with variables**](/en/integrations/grafana/advanced-api/03-variables.md) - Create dropdowns for site and machine selection