For the complete documentation index, see llms.txt. This page is also available as Markdown.

Setup sheet

Define and manage setup sheets for your products

In the Products section, you get a complete overview of all data collected by ENLYZE, displayed from the perspective of each product. Setup sheets define the parameter limits and production guidelines for manufacturing a product on a specific machine, serving as the basis for the Co-Pilot and batch records.

Products

This section allows you to:

  • Explore your product portfolio: Keep track of all products registered in ENLYZE.

  • Identify sensitive products early: Use the product overview to consult production data and detect which products may require special attention.

  • Manage setup sheets: Setup sheets act as templates for the batch record and Co-Pilot, helping ensure optimal production results.

Product list

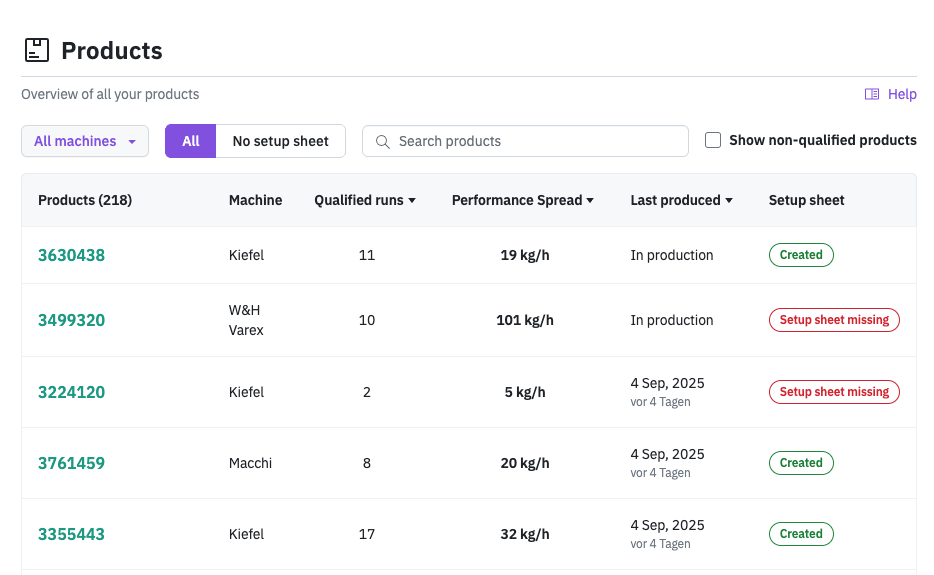
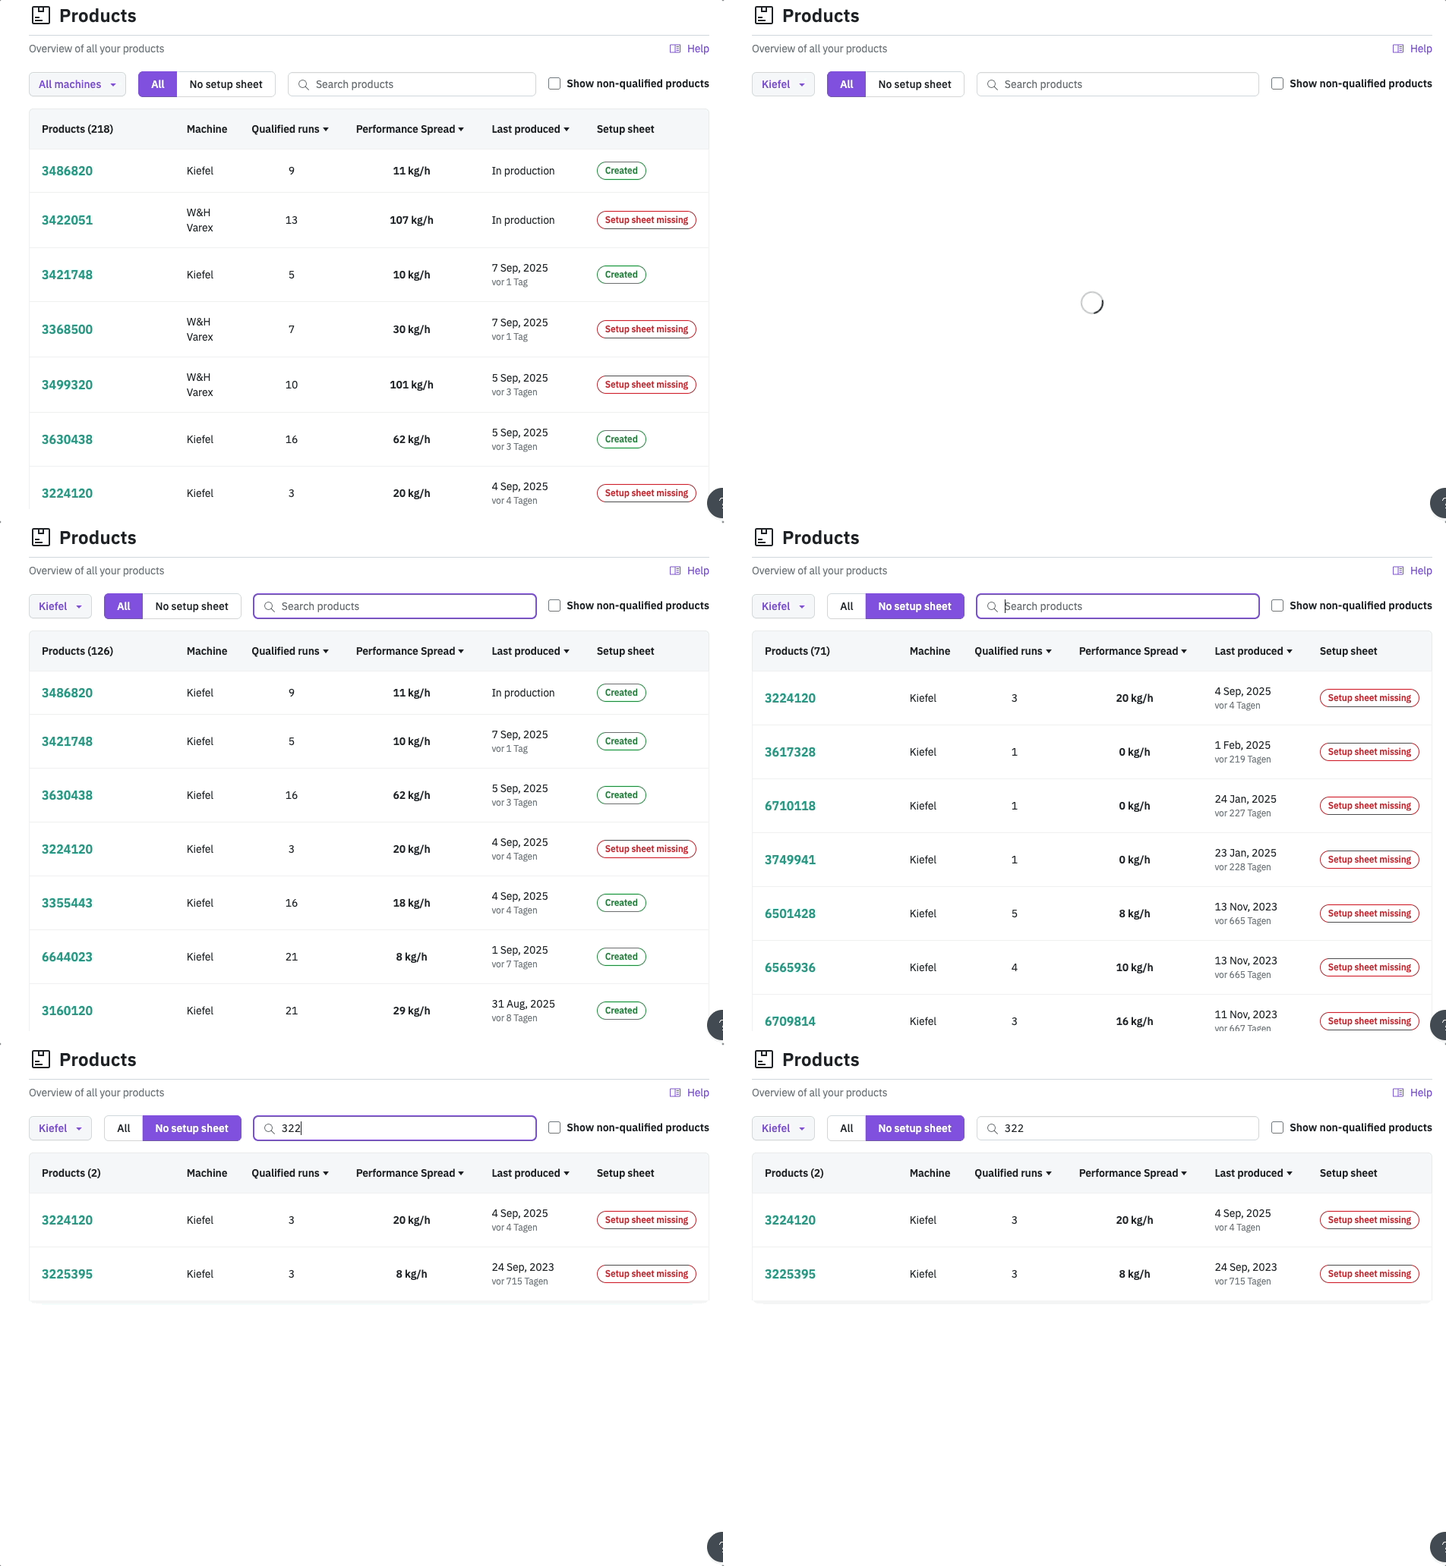
The product list is your central hub for monitoring all products and their current production status. It helps you stay on top of production performance and quality. For each product, the following information is shown:

  • Product: Name or code of the product.

  • Machine: The machine on which the product was produced.

  • Qualified Runs: Total number of production runs that meet defined criteria (e.g., minimum run length, no negative scrap).

  • Performance Spread: Variation in production performance across different runs.

  • Last Produced: The most recent date the product was manufactured on that machine.

  • Setup Sheet: Indicates whether a setup sheet has been created for the product.

Filter options

To help you find relevant information quickly, several filter options are available:

  • Machines: Limit the view to products made on a specific machine.

  • No Setup Sheet: Quickly identify products without a configured setup sheet.

  • Search Box: Find a product by entering its name or code.

  • Non-Qualified Products: Toggle the visibility of products that have been produced but don't yet have a qualified production run. These are hidden by default as no relevant data is available yet.

Note: The product list only includes products that have been manufactured at least once since ENLYZE was installed.

You might notice that some products appear multiple times. This happens because ENLYZE shows the combination of machine and product, as the same product can be produced differently depending on the machine used.

Product overview

The product overview in the ENLYZE app gives you valuable insights into how a product performs on a specific machine.

Note: If a product is processed on more than one machine, you'll see a separate overview for each machine. This allows you to track how the product behaves and performs differently across machines.

Attributes

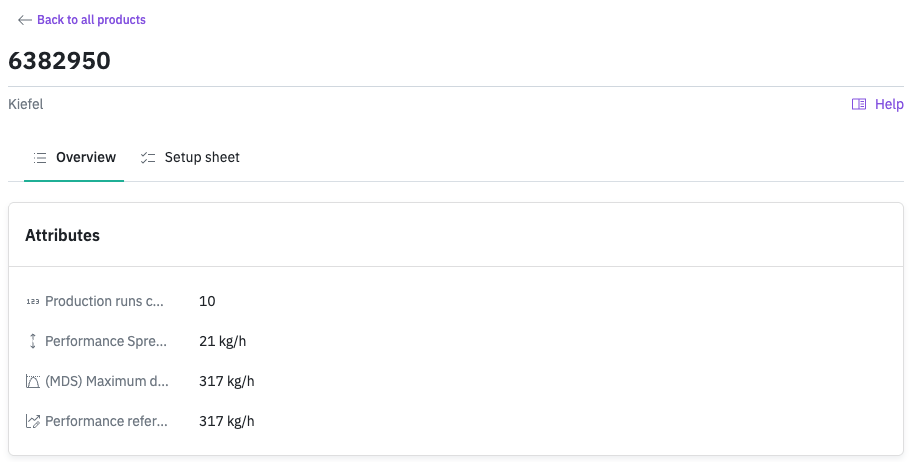
The Attributes section shows machine-specific production characteristics for the selected product:

  • Production Runs Count: Total number of production runs for this product on the selected machine.

  • Performance Spread: The variation of performance values across all runs, shown in absolute units.

  • Maximum Demonstrated Speed (MDS): The highest observed production speed for this product on the selected machine. Learn more about how the MDS is calculated here.

  • Performance Reference: The speed the performance factor is calculated against. The MDS by default. You can override it, see Adjusting the performance reference.

Product statistical insights

Once the product has been produced several times on the same machine, ENLYZE automatically generates valuable statistical insights, which are displayed in the product overview.

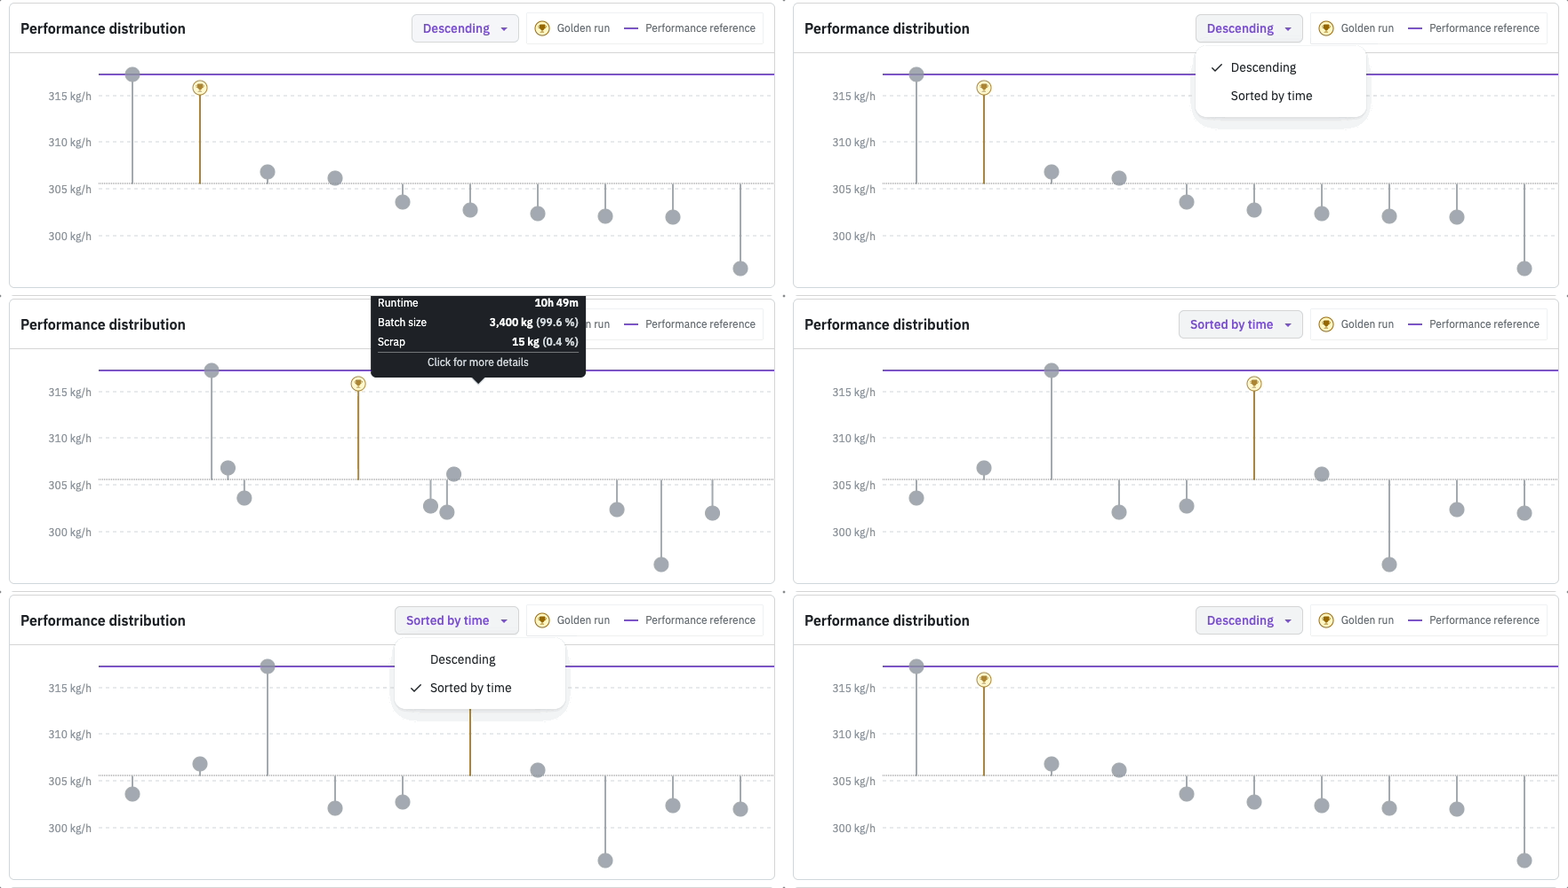
Performance distribution

This chart visualizes the performance of every production run recorded in ENLYZE. Using the dropdown, the runs can be sorted by execution time or descending performance. You can spot the Golden Run (highlighted in yellow), representing the best production performance, and the purple line indicates the set performance reference.

Material overview

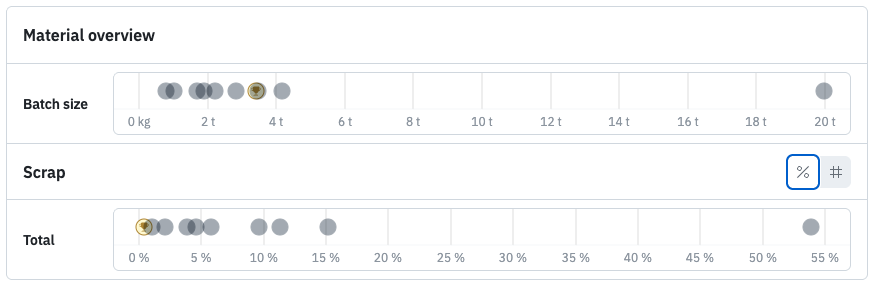
Production conditions can vary between runs. To help you evaluate which runs are worth reproducing, the Material Overview provides more context:

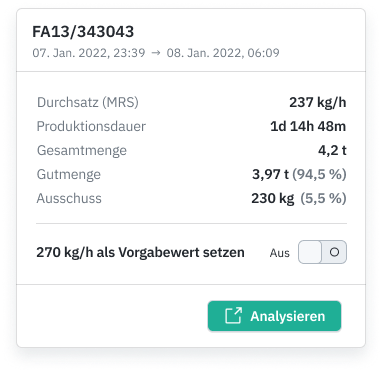
  • Batch Size: Total quantity of material produced in each run, calculated from run duration and throughput.

  • Scrap: Amount of defective material per run, shown as a percentage or in absolute units.

Setup sheet

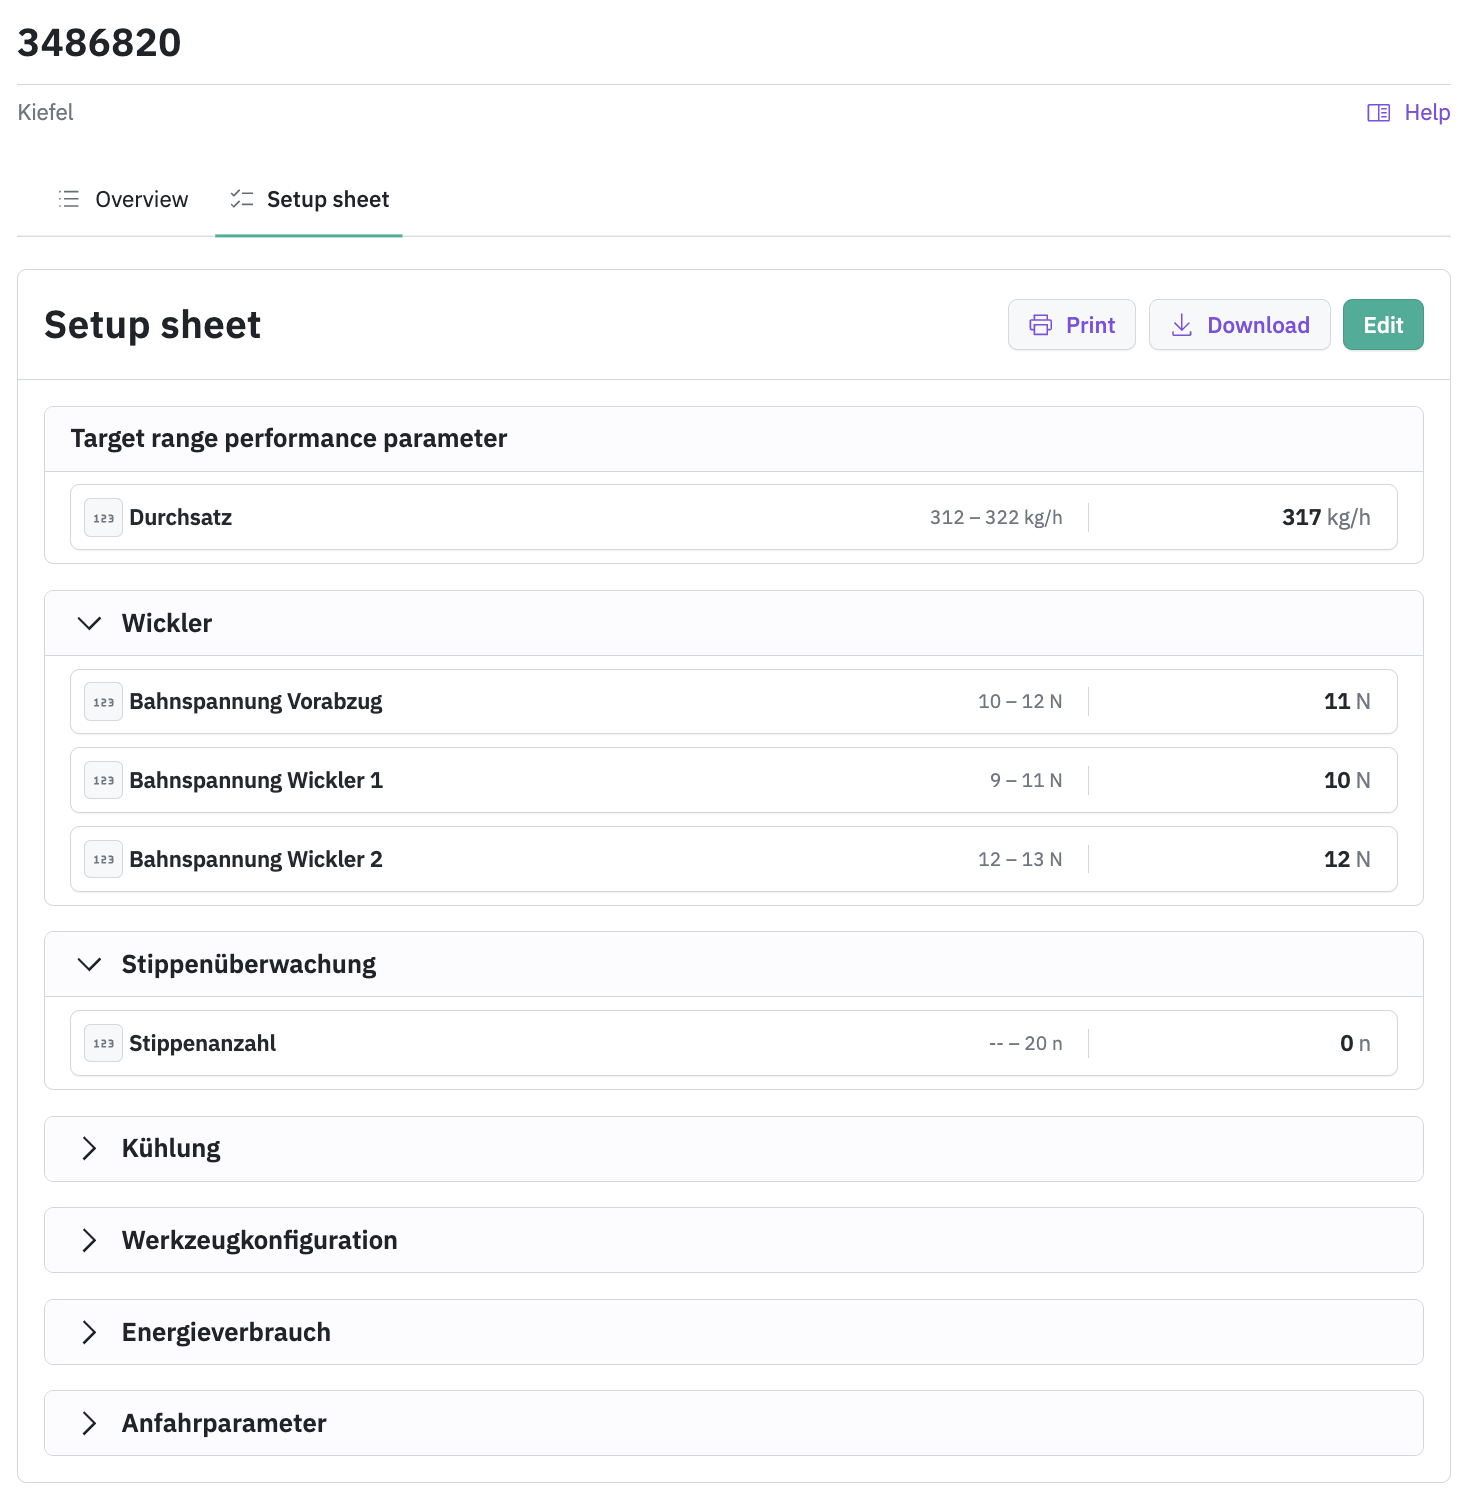
In the Setup Sheet section of a product, you can create, edit, and review specific parameter limits and guidelines for producing the product on a selected machine.

The setup sheet for a product is based on the template defined at the machine level. This means that before you can create a setup sheet for a product, a corresponding template must first be created for the machine.

If the selected product doesn't have a setup sheet yet, ENLYZE will prompt you to create one. We've also prepared a detailed guide that explains the different ways to create a setup sheet for a product: create a product setup sheet

Once configured, the setup sheet will appear in the product's Setup Sheet section, where you can:

  • View the full set of defined limits.

  • View the attached images and open them in a full-screen view with a click.

  • Print or download the setup sheet (CSV format).

  • Make changes to the existing limits if needed.

What is the setup sheet used for?

The setup sheet serves two key purposes:

Process control If you're tracking live production runs in ENLYZE, the Co-Pilot feature can display the relevant setup limits for the product currently being manufactured.

Quality assurance To prove that your process meets quality standards, you can generate a batch record. This record compares actual machine data against the defined setup limits. To create such records, go to the Analysis section in the app.

Create a product setup sheet

A product setup sheet defines the parameter limits and production guidelines for manufacturing a product on a specific machine.

Before you start: You'll need a setup sheet template for the machine. If you haven't created one yet, check out the section below on how to set it up: Configuring the template.

How to create a product setup sheet

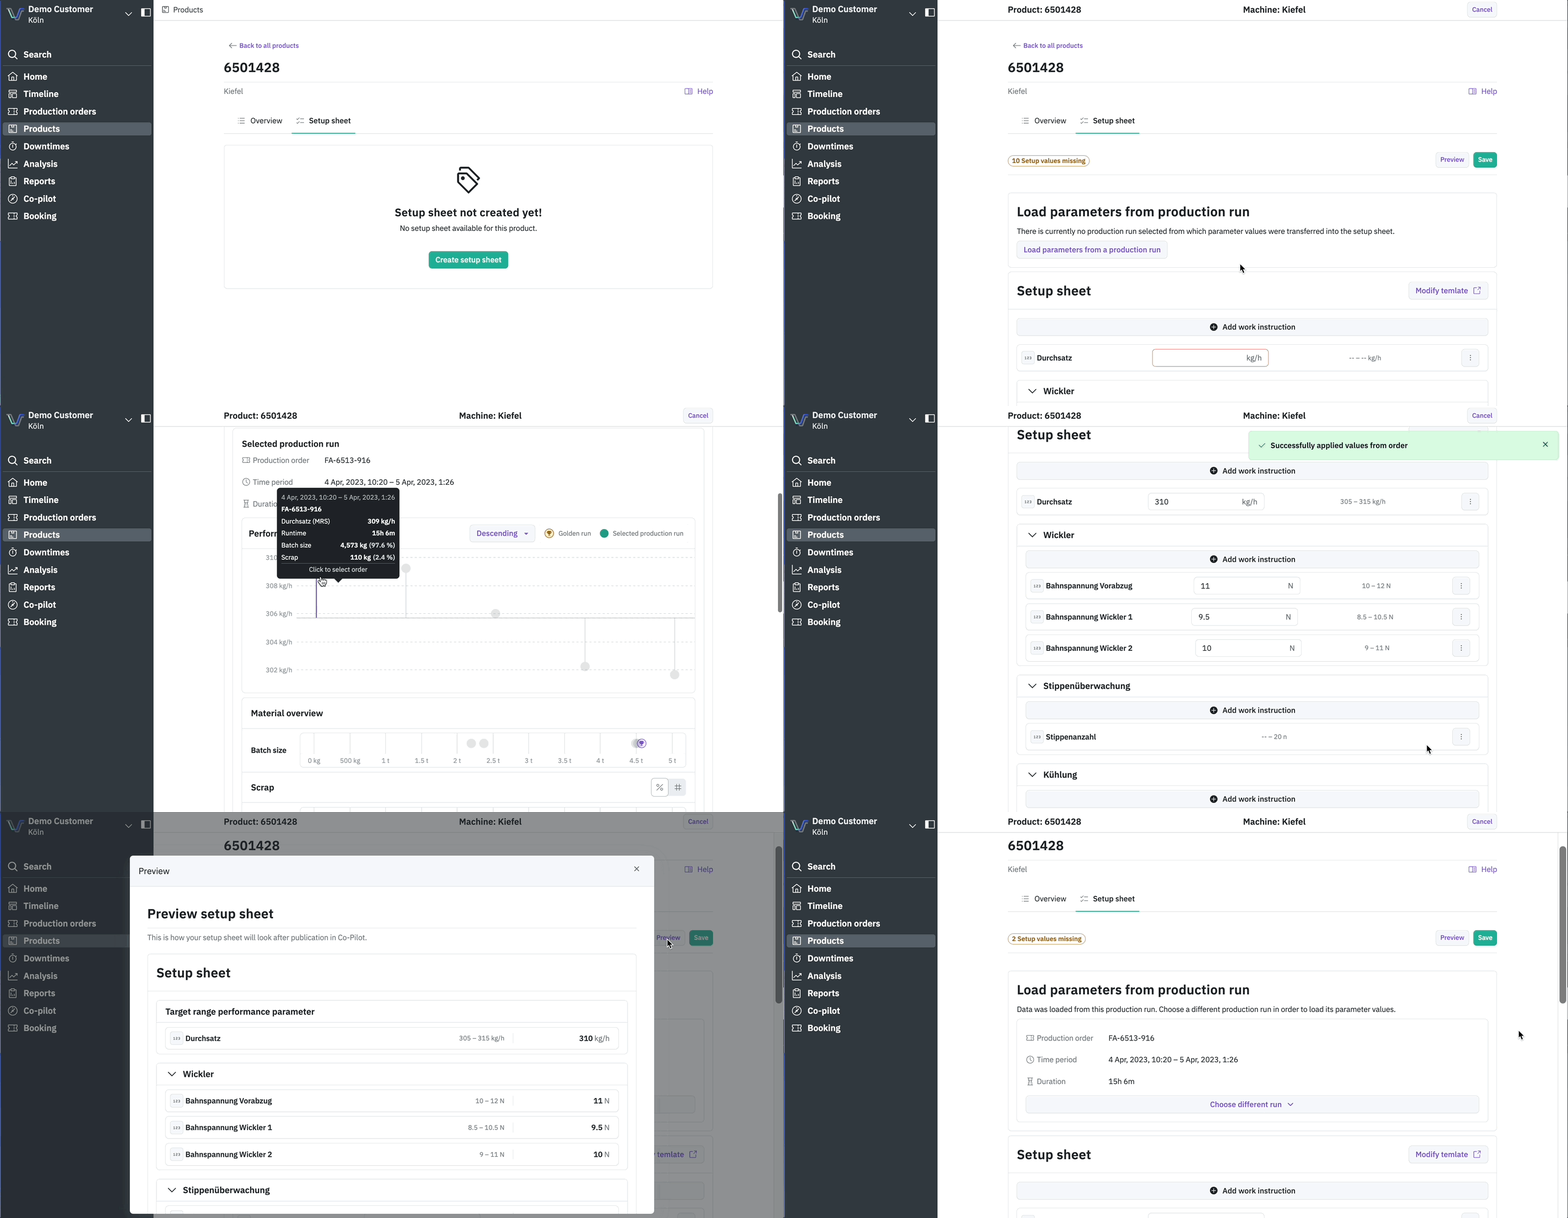
To create a product setup sheet, open the Products section in the ENLYZE App and select your desired product. Access the setup sheet section and click on Create setup sheet.

1

Define target values

You can define the target values for each parameter in two ways:

  • Manually: Enter the target values directly.

  • From an existing production run: Click on Load parameters from a production run, then select your reference. The target values are then populated automatically from the machine data of that production run.

Which time range the values come from: not the entire production run, but the Maximum Run Speed (MRS) window of that run. This is the window in which the machine reached its highest stable speed during the run. It is exactly as long as the machine's optimization interval and contains no downtimes, no data gaps, and no overlapping bookings. The optimization interval is configured per machine; 600 seconds (10 minutes) is the recommended value.

For each parameter, the median of all values within that window is used as the target value, not the average. The median is more robust against individual outliers.

The Time period and Duration shown in the selection dialog refer to the entire production run, not to the MRS window.

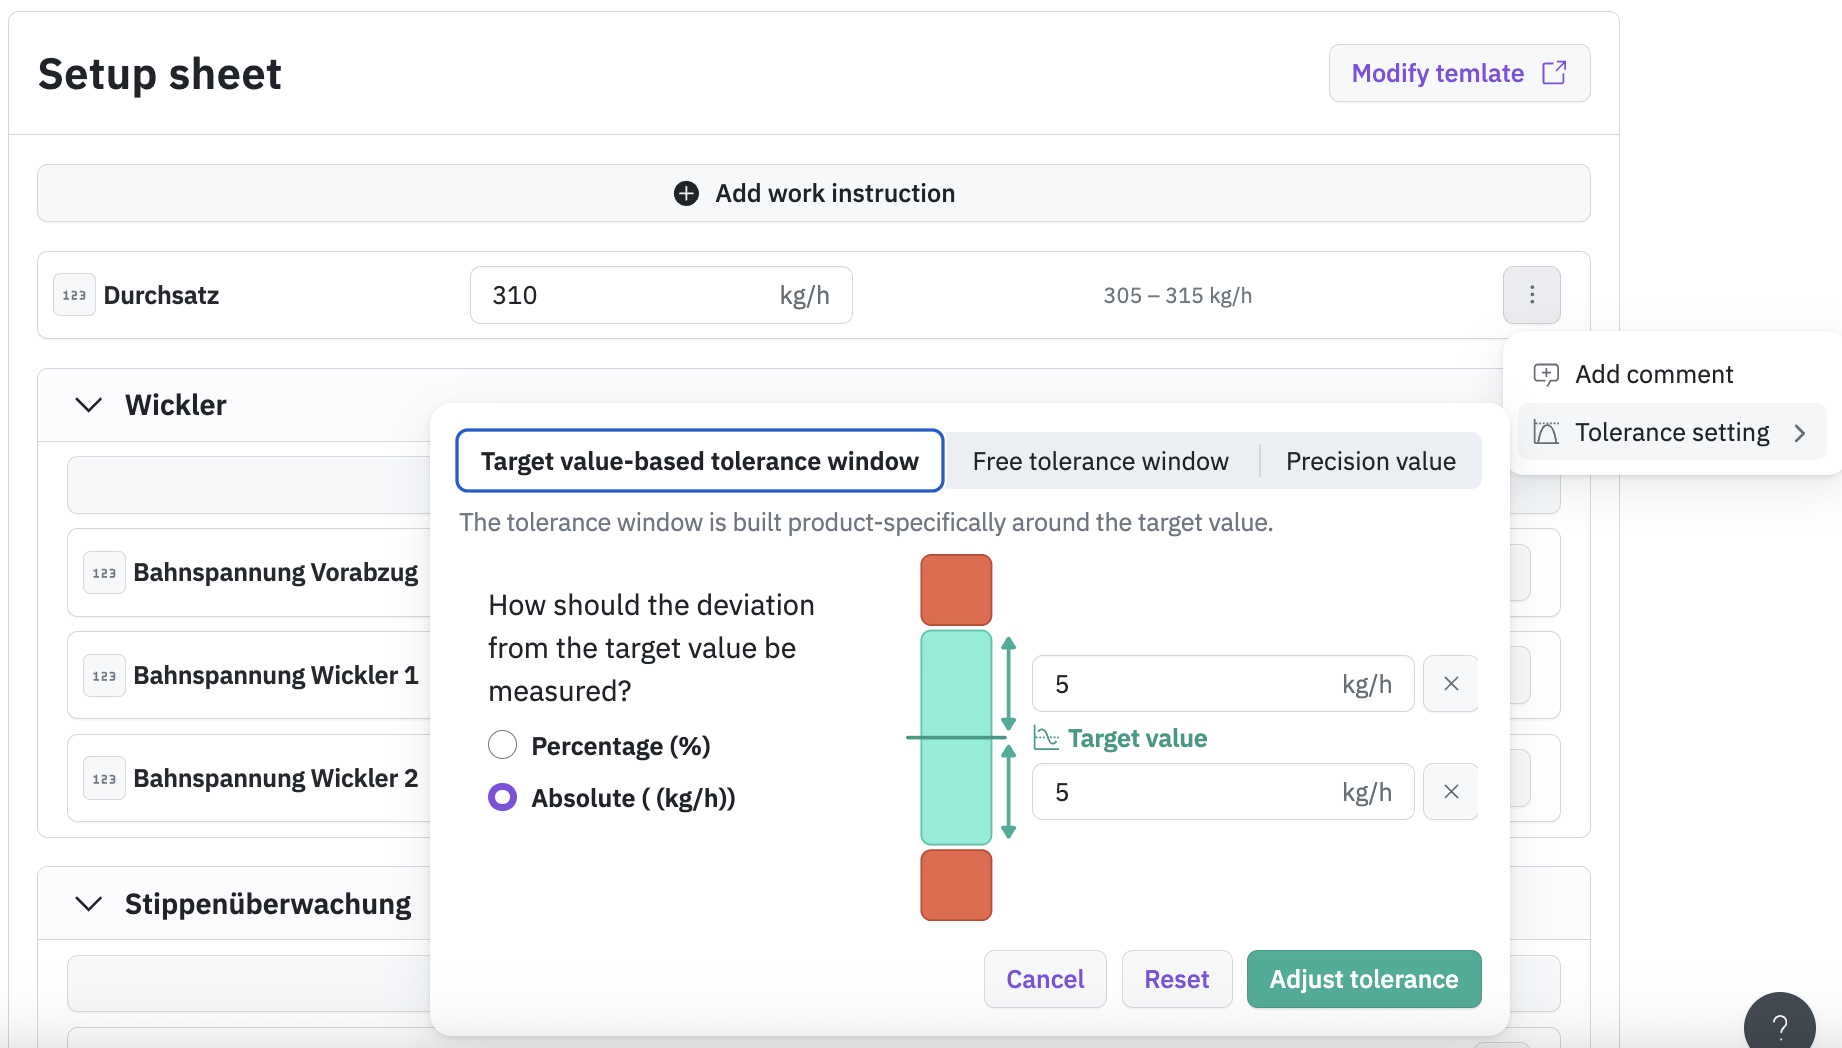
If you want to adjust the tolerance for a specific parameter, click the three-dot menu next to it and customize it accordingly.
2

Add work instructions (optional)

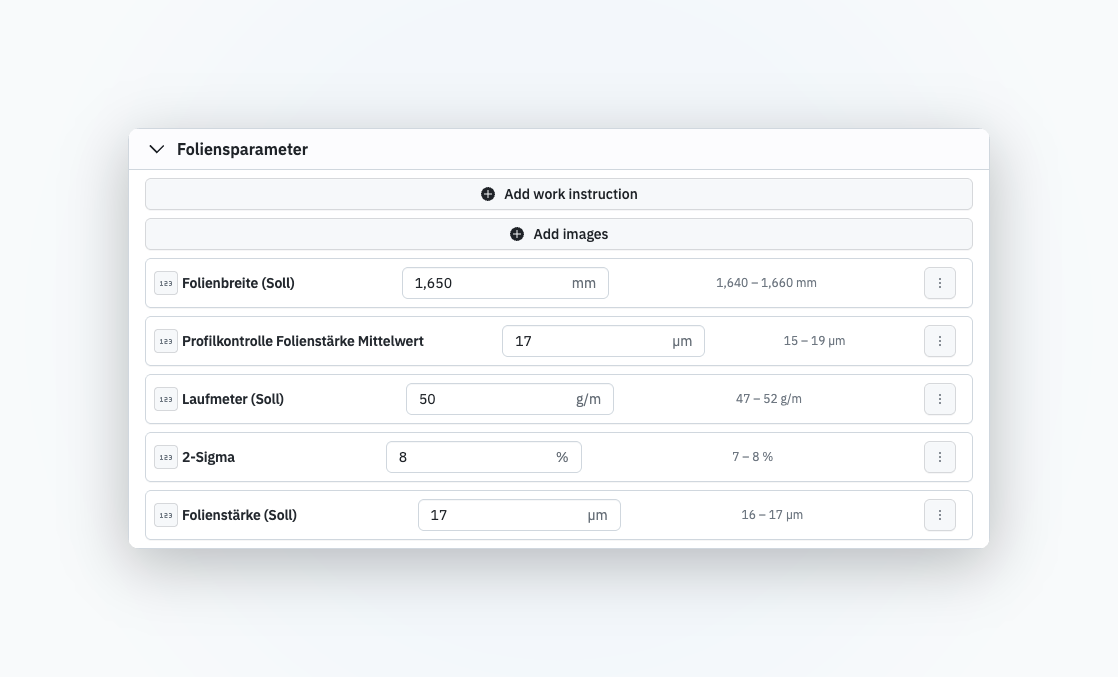
Each parameter group allows you to add specific work instructions that may be helpful for machine operators during production.

3

Add images (optional)

For each parameter group, you can upload images in the Images section, for example photos of the machine setup, technical drawings, or reference pictures of the finished product. This gives machine operators additional guidance on how to set up the machine or what the final product should look like.

To get started, click Add images in the parameter group.

Parameter group in edit mode with the Add images button
Add images to a parameter group via the Add images button
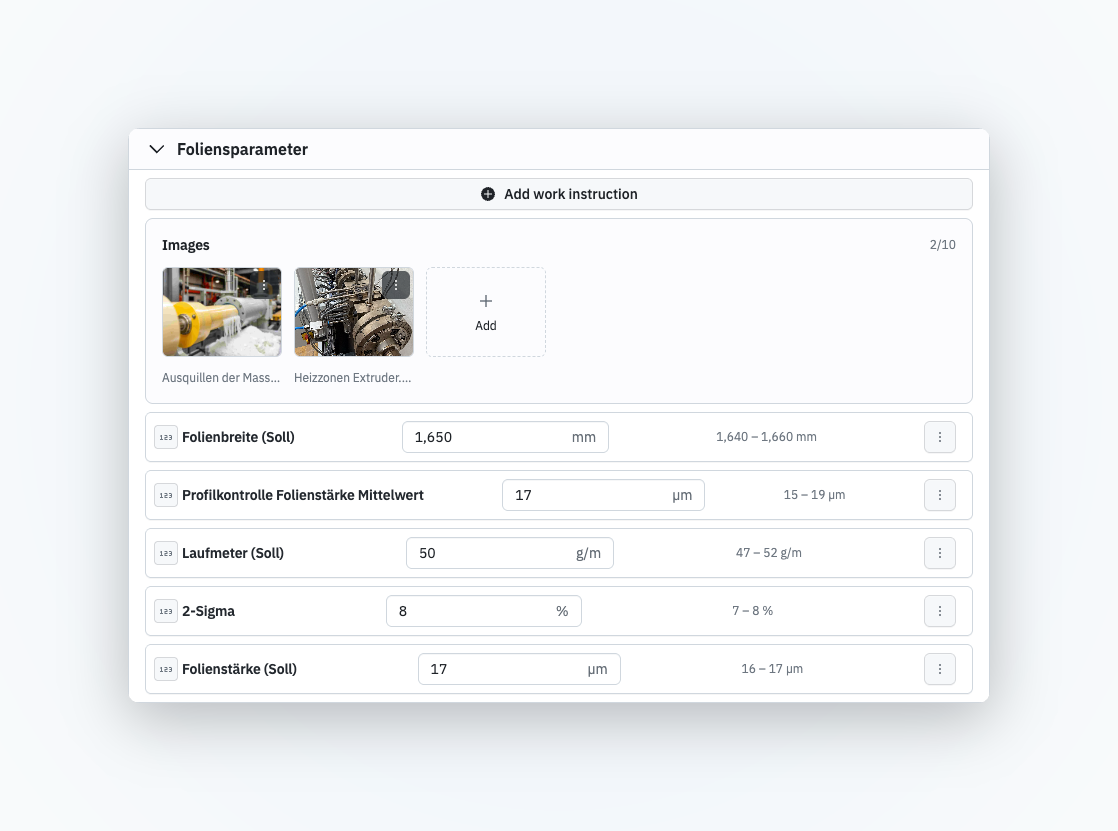
Drag the images into the upload area or click it to select files. To remove an image, open its three-dot menu and click Remove. The images are uploaded when you save the setup sheet.

The following limits apply:

  • Supported formats: JPG and PNG

  • Up to 10 images per parameter group

  • Up to 10 MB per image

Parameter group with two uploaded images in the Images section
Uploaded images of a parameter group
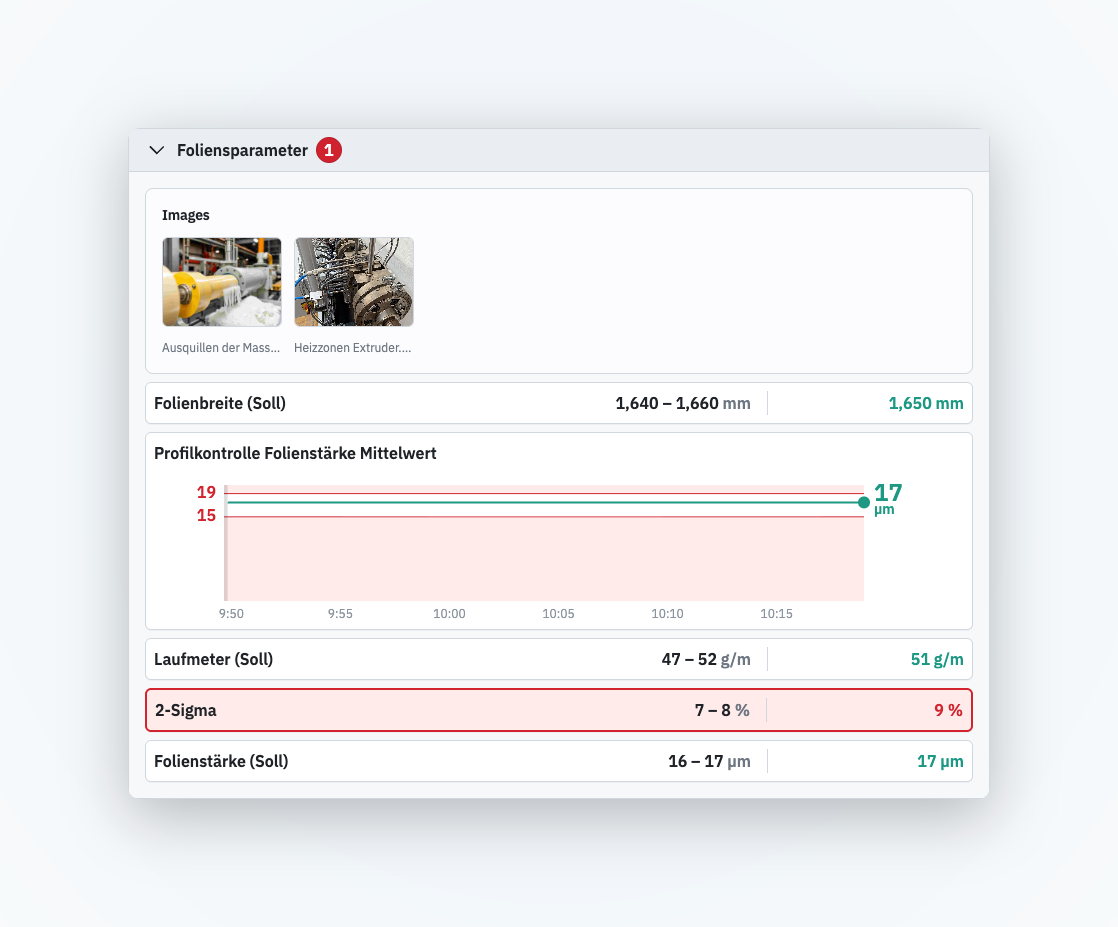
The images then appear with their parameter group in the setup sheet and in the Co-Pilot. Click an image to open it in a full-screen view.

Parameter group in the Co-Pilot showing the attached images
The attached images of the parameter group in the Co-Pilot
4

Preview and save

Use the Preview button to see the full configuration of your setup sheet.

When everything looks good, click Save to store your changes.

Production optimization

With production optimization, you can optimize your products quickly, easily, and in a data-driven way.

Production optimization allows you to:

  • Analyze individual products for performance and scrap variations

  • Find and define the ideal setup parameters (best-practice parameters) for your products

The optimization follows 3 simple steps:

Video introduction

Step 1: Define setup parameters

Setup parameters are the parameters that the machine operator configures on the machine.

If no setup parameters have been defined for your machine yet, you will see the following error message on the production optimization page:

Error message when no setup parameters have been defined.
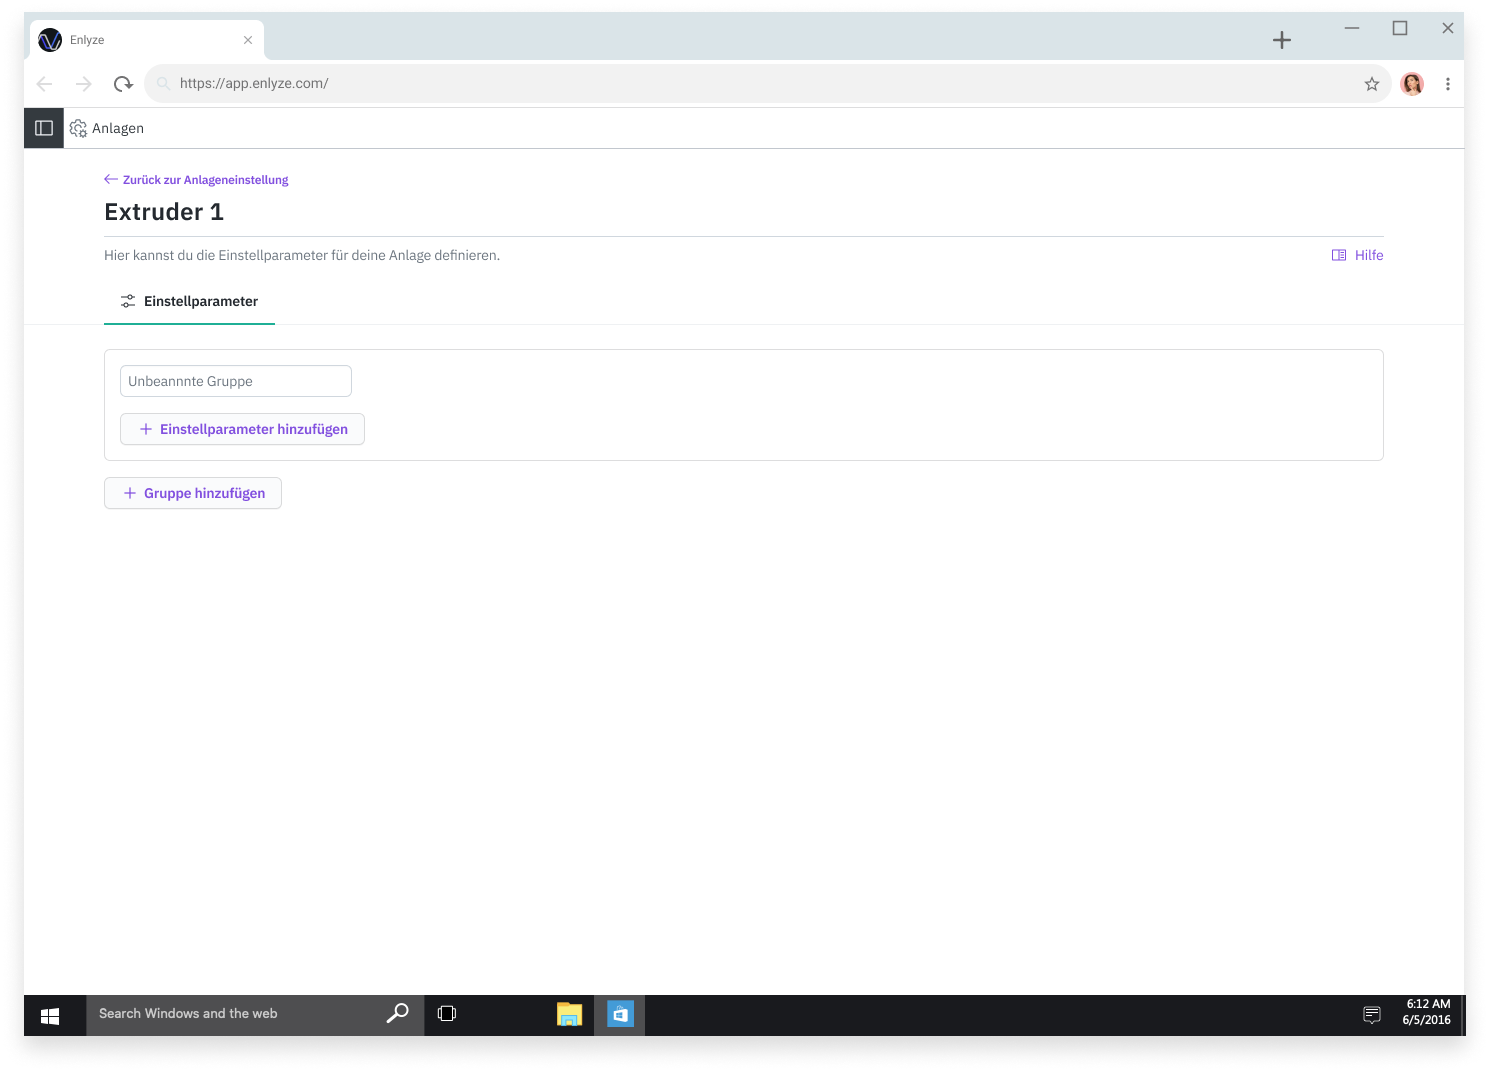
Click the Define setup parameters button to navigate to the setup parameters page. You can also reach this page via the Settings tab in the sidebar and the Setup parameters button for the respective machine.

Define setup parameters

Here you can create and name any number of groups. Then fill each group with the relevant setup parameters.

Tip Choose groups that make sense for the machine operators. For example, make sure that parameters which are configured at the same location on the machine are placed in the same group.

Step 2: Select a reference production run

Using the production optimization screen, you can select an appropriate reference production run. For this production run, the previously defined setup parameters are extracted and stored as best-practice parameters for the product.

To help you select a suitable reference production run and define best-practice parameters, the following is shown for each production run:

  • Throughput performance

  • Batch size

  • Scrap

    • absolute in kg or the unit in which scrap is measured

    • relative in proportion to the batch size

Each point represents an individual production run. Hover over a point to see additional details about the production run in a tooltip.

Clicking on a point opens a dialog that allows you to set this production run as the reference and define the best-practice parameters for the selected product.

Once the best-practice parameters have been stored for the product, it can be manufactured repeatably with the ideal machine settings.

Step 3: Use best-practice parameters

The best-practice parameters can now be used in the following ways:

  • Download a .csv file and use the data in other tools

  • Print the parameters and make them available on the shop floor in printed form

  • Use the Co-Pilot, a digital tool for the shop floor

Performance parameter not defined

A performance parameter must be configured before production optimization and the Co-Pilot can be set up and used.

If the performance parameter has not been defined, you will see the following message:

Missing performance parameter

The performance parameter is the process variable that defines the machine's performance, such as throughput, line speed, etc.

In production optimization, the performance parameter is the optimization target and therefore the central element of the feature. Without it, no configuration can be performed.

To resolve this, click Contact your representative and reach out to your ENLYZE contact via the in-app chat. The performance parameter will then be defined together with you.

Material tracking

ENLYZE determines raw material consumption based on throughput and run duration of a production run. There are two options for calculating material efficiency, specifically the good quantity and scrap.

With Option 2, you can distinguish between startup scrap and running scrap.

Option 1: Good quantity is captured and reported

If the good quantity is captured, ENLYZE automatically calculates the scrap figures in the background.

The raw material consumption is determined based on the production run duration. The good quantity is then subtracted from this raw material consumption to obtain the scrap amount.

Incorrect booking of production run durations will therefore lead to incorrect scrap figures.

Option 2: Scrap is captured and reported

If scrap is captured, the system can distinguish between startup and running scrap. This distinction must already exist in your current system.

Distinguishing between startup and running scrap helps achieve faster and more accurate results in later root-cause analyses.

If this distinction is desired, it must be discussed and defined during the integration of the system.

The reported scrap quantities (startup + running scrap) combined with the raw material consumption allow for calculating the produced good quantity.

Production run requirements

Production runs displayed in the production optimization view serve as the basis for selecting a reference production run, which in turn defines the setup parameters for the product. Therefore, certain requirements must be met for production runs to appear in the optimization view.

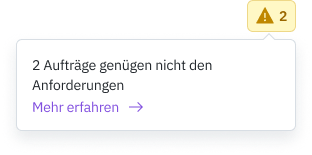
If there are production runs that do not meet the requirements, the following icon is displayed. The number indicates how many production runs for this product do not meet the requirements:

Production runs that do not meet the requirements

The requirements for a production run to be displayed are:

  1. The production run must have a continuous time range without data gaps of at least the optimization interval. The optimization interval is configured per machine; 600 seconds (10 minutes) is the recommended value.

  2. There must be no overlapping bookings for this time range.

  3. There must be no negative scrap.

Last updated